In this exercise we will explore the sample TODO List application and create a pipeline in Jenkins to build and deploy our code.
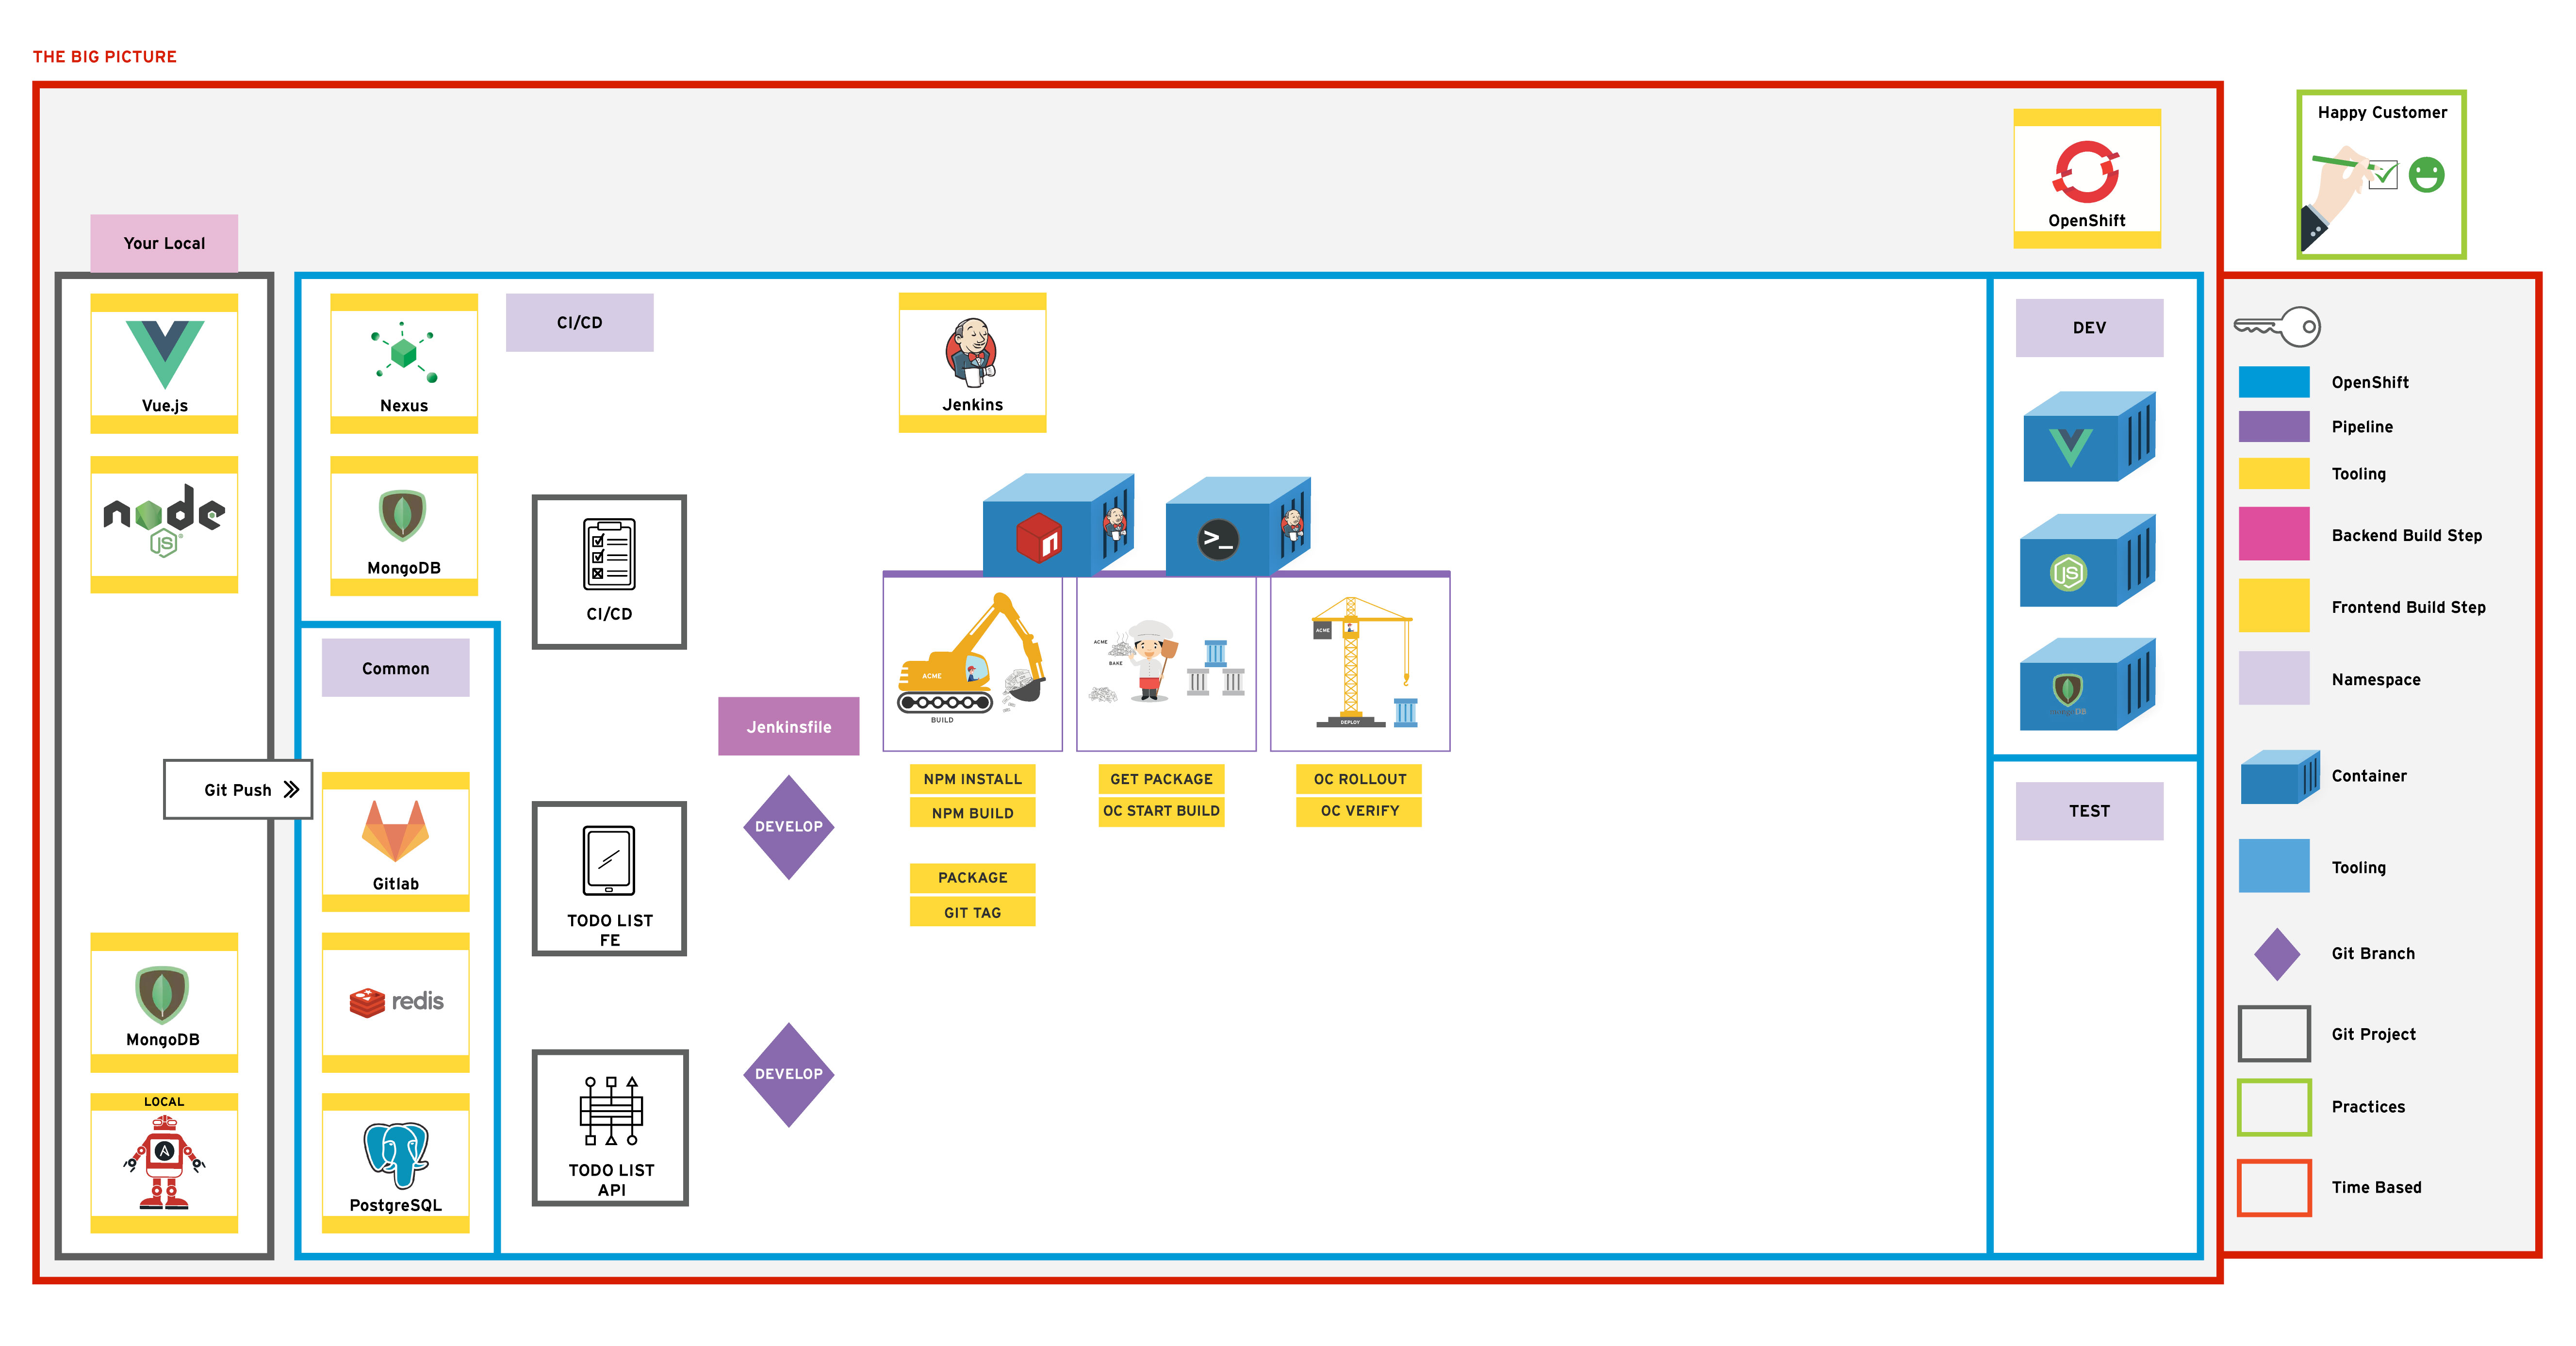
This lesson is focused on creating a pipeline for our application. What is a pipeline? A pipeline is a series of steps or stages that takes our code from source to a deployed application. There can be many stages to a pipeline but a simple flow is to run a build > bake > deploy. Usually the first stage is triggered by something like a git commit.
There could be many steps in each of these stages; such as compiling code, running tests and linting. All of these are done to try and drive up code quality and give more assurance that what is deployed is behaving as expected. In the exercise we will create a Jenkins pipeline by configuring it through the Jenkins web UI, which will create an un-gated pathway to production.
First we will explore the sample application and get it running locally. The sample app is a todolist app - the Hello World app of the modern day.
As a learner by the end of this lesson you will be able to:
The following tools are used throughout this exercise. Familiarity with them is not required but knowing what they are may help. You will not need to install Vue or MongoDB. They are taken care of by our
todolistapp.
From the previous exercise; we created some supporting tooling needed by our app. Now we will introduce our Sample App and create a pipeline for it
In this part of the exercise we will explore the sample application, become familiar with it locally before building and deploying in OCP Land
todolist-fe project to the do500-workspace folder and checkout the develop branch using the following commands.NOTE: Microsoft Windows users, run the following commands in a `Git Bash` window. Recall that the full path to the `do500-workspace` folder is `/c/do500-workspace` in `Git Bash`.
cd ~/do500-workspace
git clone https://github.com/RedHatTraining/rht-labs-todolist-fe todolist-fe
cd todolist-fe
./git-pull-all.sh
git checkout develop
Open up Gitlab and login. Create a new project (internal) in GitLab called todolist-fe to host your clone of the project and copy its remote address. 
In your local clone of the todolist-fe, remove the origin and add the GitLab origin by replacing <YOUR_GIT_LAB_PROJECT>. Push your app to GitLab. (As before, we will bypass SSL key verification in this repo since we are using self-signed certificates on the GitLab sever.)bash git config http.sslVerify false git remote set-url origin <YOUR_GIT_LAB_PROJECT> # verify the origin has been updated git remote -v git push -u origin --all
The todolist-fe has a package.json at the root of the project, this defines some configuration for the app including its dependencies, dev dependencies, scripts and other configuration. Install the app's dependenciesbash npm install
The todolist-fe has some scripts defined in the package.json at the root of the project. A snippet of the npm scripts are shown below. To run any of these scripts run npm run <SCRIPT_NAME>. Let's start by serving our application
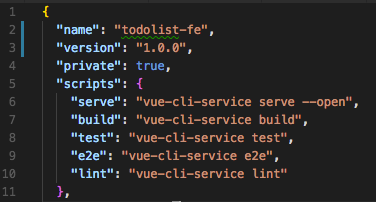
bash npm run serve
NOTE: Microsoft Windows users, if you are running this command for the first time, you may be prompted by the Windows Defender Firewall to allow access. Click Allow Access to continue.
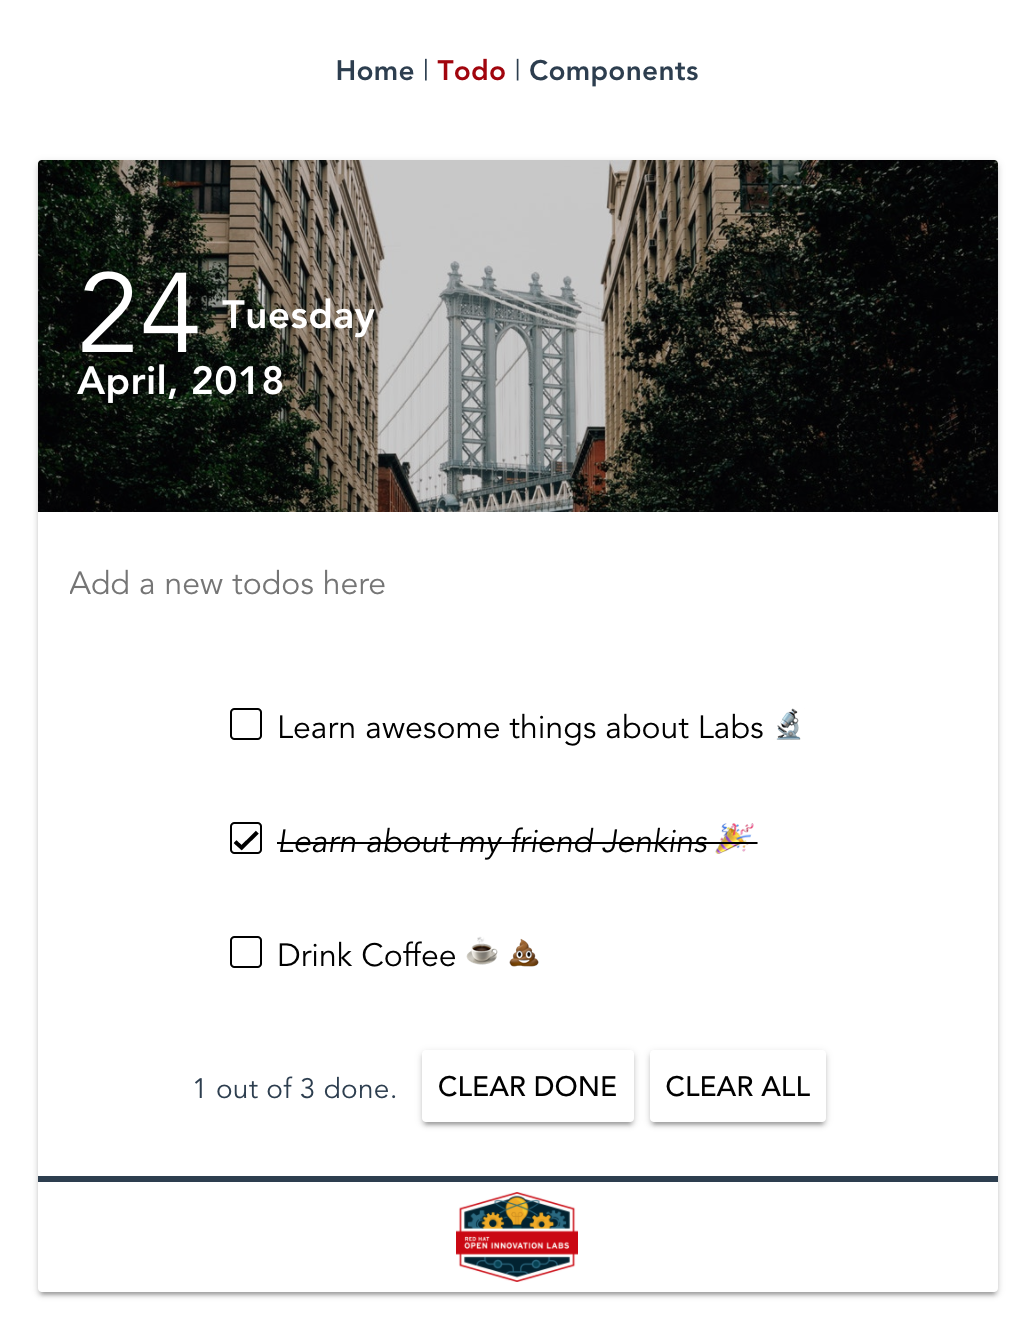
This will take sometime to execute; but once done it should open the browser for you displaying the homepage of the todolist-fe app.
The app is a todolist manager built in Vue.js. Play around with the App. You will notice when you add todos they appear and clear as expected. If you refresh the page you'll lose all additions. This is because there is no persistence layer. We will add one in the next part.
The structure of the todolist-fe is as follows.bash todolist-fe ├── jest.config.js ├── jsconfig.json ├── nightwatch.config.js ├── node_modules ├── package.json ├── public │ ├── favicon.ico │ ├── img │ ├── index.html │ └── manifest.json ├── src │ ├── App.vue │ ├── assets │ ├── components │ │ └── * │ ├── config │ ├── main.js │ ├── registerServiceWorker.js │ ├── router.js │ ├── scss │ ├── services │ ├── store │ │ └── * │ └── views │ └── * ├── tests │ ├── e2e │ └── unit └── vue.config.js
where the following are the important things:
./src is the main collection of files needed by the app. The entrypoint is the main.js which is used to load the root App.vue file../node_modules is where the dependencies are stored./test contains our end-to-end tests and unit tests. More covered on these in later exercises../src/components contains small, lightweight reusable components for our app. For example, the NewTodo component which encapsulates the styling, logic and data for adding a new todo to our list./src/store is the vuex files for managing application state and backend connectivity./src/views is the view containers; which are responsible for loading components and managing their interactions../src/router.js controls routing logic. In our case the app only has one real endpoint../src/scss contains custom SCSS used in the application../*.js is mostly config files for running and managing the app and the testsTo prepare Nexus to host the binaries created by the frontend and backend builds we need to run a prepare-nexus script. Before we do this we need to export some variables and change <YOUR_NAME> accordingly in the below commands.
NOTE: Microsoft Windows users, run the following commands in the *do500-toolbox* container. Linux and MacOS users should skip this tep and continue from the *oc login* step.
docker run -it -v C:/do500-workspace:/home/tool-box/workarea:Z quay.io/redhat/do500-toolbox /bin/bash
oc login -u <username> -p <password> <CLUSTER_URL>
export NEXUS_SERVICE_HOST=$(oc get route nexus --template='{{.spec.host}}' -n <YOUR_NAME>-ci-cd)
export NEXUS_SERVICE_PORT=80
npm run prepare-nexus
todolist-api and wire them together. As with the todolist-fe we need to clone the repo and add it to our GitLab in the cluster.NOTE: Microsoft Windows users, run the following commands in a `Git Bash` window. Recall that the full path to the `do500-workspace` folder is `/c/do500-workspace` in `Git Bash`.
cd ~/do500-workspace
git clone https://github.com/RedHatTraining/rht-labs-todolist-api todolist-api
cd todolist-api
./git-pull-all.sh
git checkout develop
On GitLab; create a new project (internal) called todolist-api to host your clone of the project and copy its remote address as you did for the previous repositories.
In your local clone of the todolist-api, remove the origin and add the GitLab origin by replacing <YOUR_GIT_LAB_PROJECT>. Push your app to GitLab. (As before, we will bypass SSL key verification in this repo since we are using self-signed certificates on the GitLab sever.)bash git config http.sslVerify false git remote set-url origin <YOUR_GIT_LAB_PROJECT> bash git push -u origin --all
Once pushed; explore the application. It is a NodeJS application with the Express.js framework and MongoDB for persistent storage. Same as before, the package.json defines most of the configuration etc. Install the dependenciesbash npm i
While the dependencies are being installed; explore the project structure.bash todolist-api ├── Dockerfile ├── Gruntfile.js ├── README.md ├── node_modules ├── package-lock.json ├── package.json ├── server │ ├── api │ │ └── todo │ ├── app.js │ ├── components │ │ └── errors │ ├── config │ │ ├── environment │ │ ├── express.js │ │ ├── local.env.sample.js │ │ └── seed.js │ ├── mocks │ │ ├── mock-routes-config.json │ │ ├── mock-routes.js │ │ └── mock-routes.spec.js │ ├── routes.js │ └── views │ └── 404.html └── tasks └── perf-test.js
where the following are the important things:
./server is the main collection of files needed by the app. The entrypoint is the app.js./node_modules is where the dependencies are stored./server/api is where the api's controller, data model & unit test are stored../server/mocks is a mock server used for when there is no DB access./server/config stores our Express JS config, header information and other middleware../server/config/environment stores environment specific config; such as connectivity to backend services like MongoDB../tasks is a collection of additional Grunt tasks which will be used in later exercisesGrunt is a taskrunner for use with Node.JS projectspackage.json contains the dependency list and a lot of very helpful scripts for managing the app lifecycleA snippet of the npm scripts are shown below. There are application start scripts, build and test items which will be used in the build. The ones for MongoDB are just provided for convenience and require Docker installed to execute.json "scripts": { "start": "node server/app.js", "dev": "./node_modules/.bin/grunt serve", "jshint": "./node_modules/.bin/grunt jshint", "clean": "rm -rf reports package-contents*", "package": "zip -r package-contents.zip package-contents", "test": "node_modules/.bin/nyc node_modules/.bin/mocha server/**/*.spec.js --exit", "mongo" : "docker run -i -d --name mongo-local -p 27017:27017 mongo", "mongo:drop" : "npm run mongo:stop && docker rm mongo-local", "mongo:stop" : "docker stop mongo-local", "mongo:start" : "docker start mongo-local" },
To run the application; start a new instance of MongoDB by running the following. This will pull a mongodb image from Dockerhub and then start it for our API to connect to.bash npm run mongo
NOTE - npm run mongo:drop is used to completely remove the running container. npm run mongo:stop & npm run mongo:start will preserve data in the container. Microsoft Windows users, if you are running this command for the first time, you may be prompted by the Windows Defender Firewall to allow access. Click Allow Access to continue.
Fire up the todolist-api by running.bash npm run start 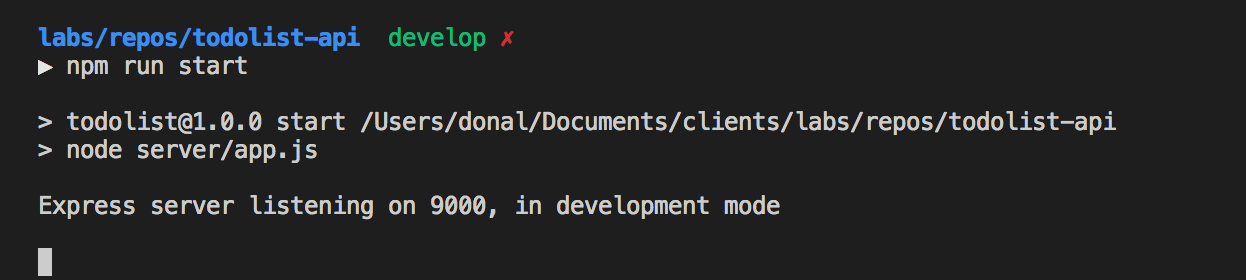
Check things are up and running by testing the API with a curl. The API should return some seeded data (stored in server/config/seed.js)bash curl localhost:9000/api/todos json [{ "_id": "5ac8ff1fdfafb02138698948", "title": "Learn some stuff about MongoDB", "completed": false, "__v": 0 }, { "_id": "5ac8ff1fdfafb02138698949", "title": "Play with NodeJS", "completed": true, "__v": 0 }]
Now let's check out todolist-fe app by reloading the browser. We should now see our dummy front end data is replaced by the backend seed data. Adding new todos will add them in the backend, these will persist when the page is refreshed.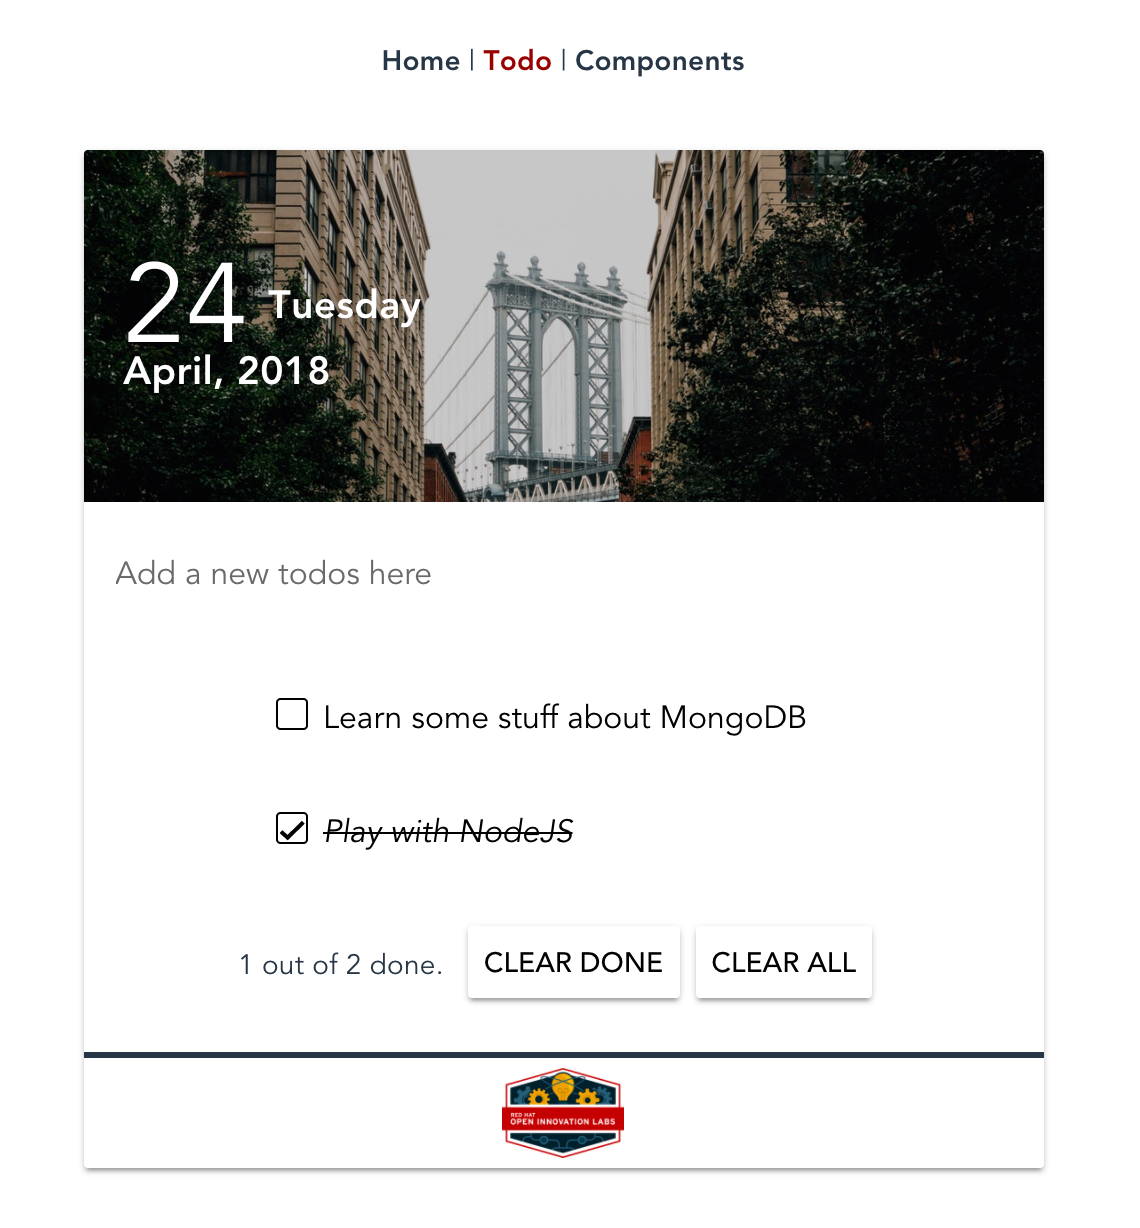
In this exercise; we will use the OpenShift Applier to drive the creation of cluster content required by the app such as MongoDB and the Apps Build / Deploy Config
On your terminal navigate to the root of the todolist-fe application. The app contains a hidden folder called .openshift-applier. Move into this .openshift-applier directory and you should see a familiar looking directory structure for an Ansible playbook. .openshift-applier ├── README.md ├── apply.yml ├── inventory │ ├── group_vars │ │ └── all.yml │ └── hosts ├── params │ ├── build │ ├── dev │ ├── ocp-pipeline │ └── test ├── requirements.yml └── templates ├── ocp-pipeline.yml ├── todolist-fe-build.yml └── todolist-fe-deploy.yml
with the following
apply.yml file is the entrypoint.inventory contains the objects to populate the cluster with.params contains the variables we'll apply to the templatestemplates required by the app. These include the Build, Deploy configs as well as the services, health checks, and other app definitions.There are a few updates to these manifests we need to make before applying the cluster content. In the apply.yml update the namespace <YOUR_NAME> variables accordingly.yaml ci_cd_namespace: donal-ci-cd dev_namespace: donal-dev test_namespace: donal-test
In the params folder update the dev and test files with the correct <YOUR_NAME> as you've done above. Example for the dev file:bash PIPELINES_NAMESPACE=donal-ci-cd NAME=todolist-fe DEPLOYER_USER=jenkins APP_TAG=latest NAMESPACE=donal-dev
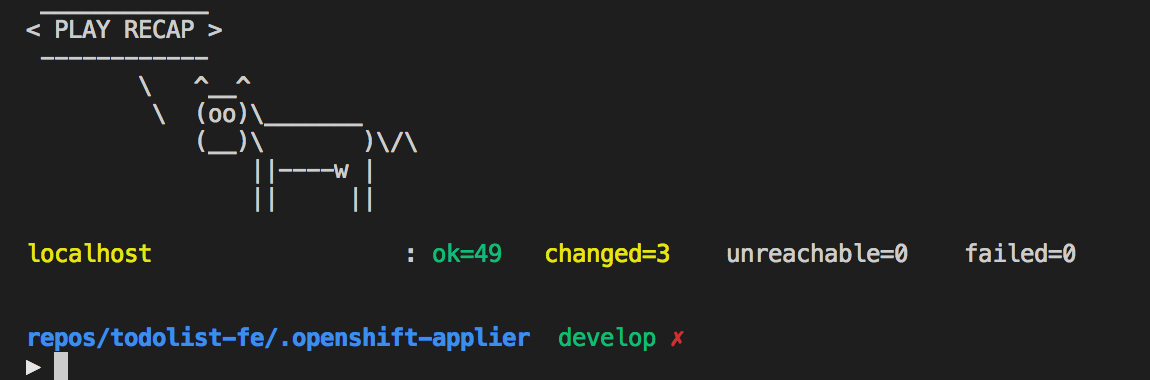
With those changes in place we can now run the playbook. First install the openshift-applier dependency and then run the playbook (from the .openshift-applier directory). This will populate the cluster with all the config needed for the front end app.
NOTE - Microsoft Windows users, run the *oc* and *ansible* commands inside the *do500-toolbox* container from the appropriate folder.
oc login -u <username> -p <password> <CLUSTER_URL>
ansible-galaxy install -r requirements.yml --roles-path=roles
ansible-playbook apply.yml -i inventory/
Once successful, commit and push your changes to gitlab.bash git add . bash git commit -m "UPDATE - change namespace vars to donal" bash git push
Back on your terminal navigate to the root of the todolist-api application. Open the .openshift-applier directory in your editor. The same layout as seen in todolist-fe should be visible with one noticeable difference; the api requires MongoDB to connect to at runtime.
In the apply.yml update the namespace <YOUR_NAME> variables accordingly. For example:yaml ci_cd_namespace: donal-ci-cd dev_namespace: donal-dev test_namespace: donal-test
In the params folder update the dev and test files with the correct <YOUR_NAME> as you've done above. Example for the dev file:bash PIPELINES_NAMESPACE=donal-ci-cd NAME=todolist-api DEPLOYER_USER=jenkins APP_TAG=latest NAMESPACE=donal-dev
Finally; run the Openshift Applier and install its dependencies to run the content into the cluster
NOTE - Microsoft Windows users, run the *ansible* commands inside the *do500-toolbox* container from the appropriate folder.
ansible-galaxy install -r requirements.yml --roles-path=roles
ansible-playbook apply.yml -i inventory/
Once successful, commit and push your changes to gitlab.bash git add . bash git commit -m "UPDATE - change namespace vars to donal" bash git push
Validate the build and deploy configs have been created in Openshift by checking <YOUR_NAME> CI-CD builds for the BuildConfigs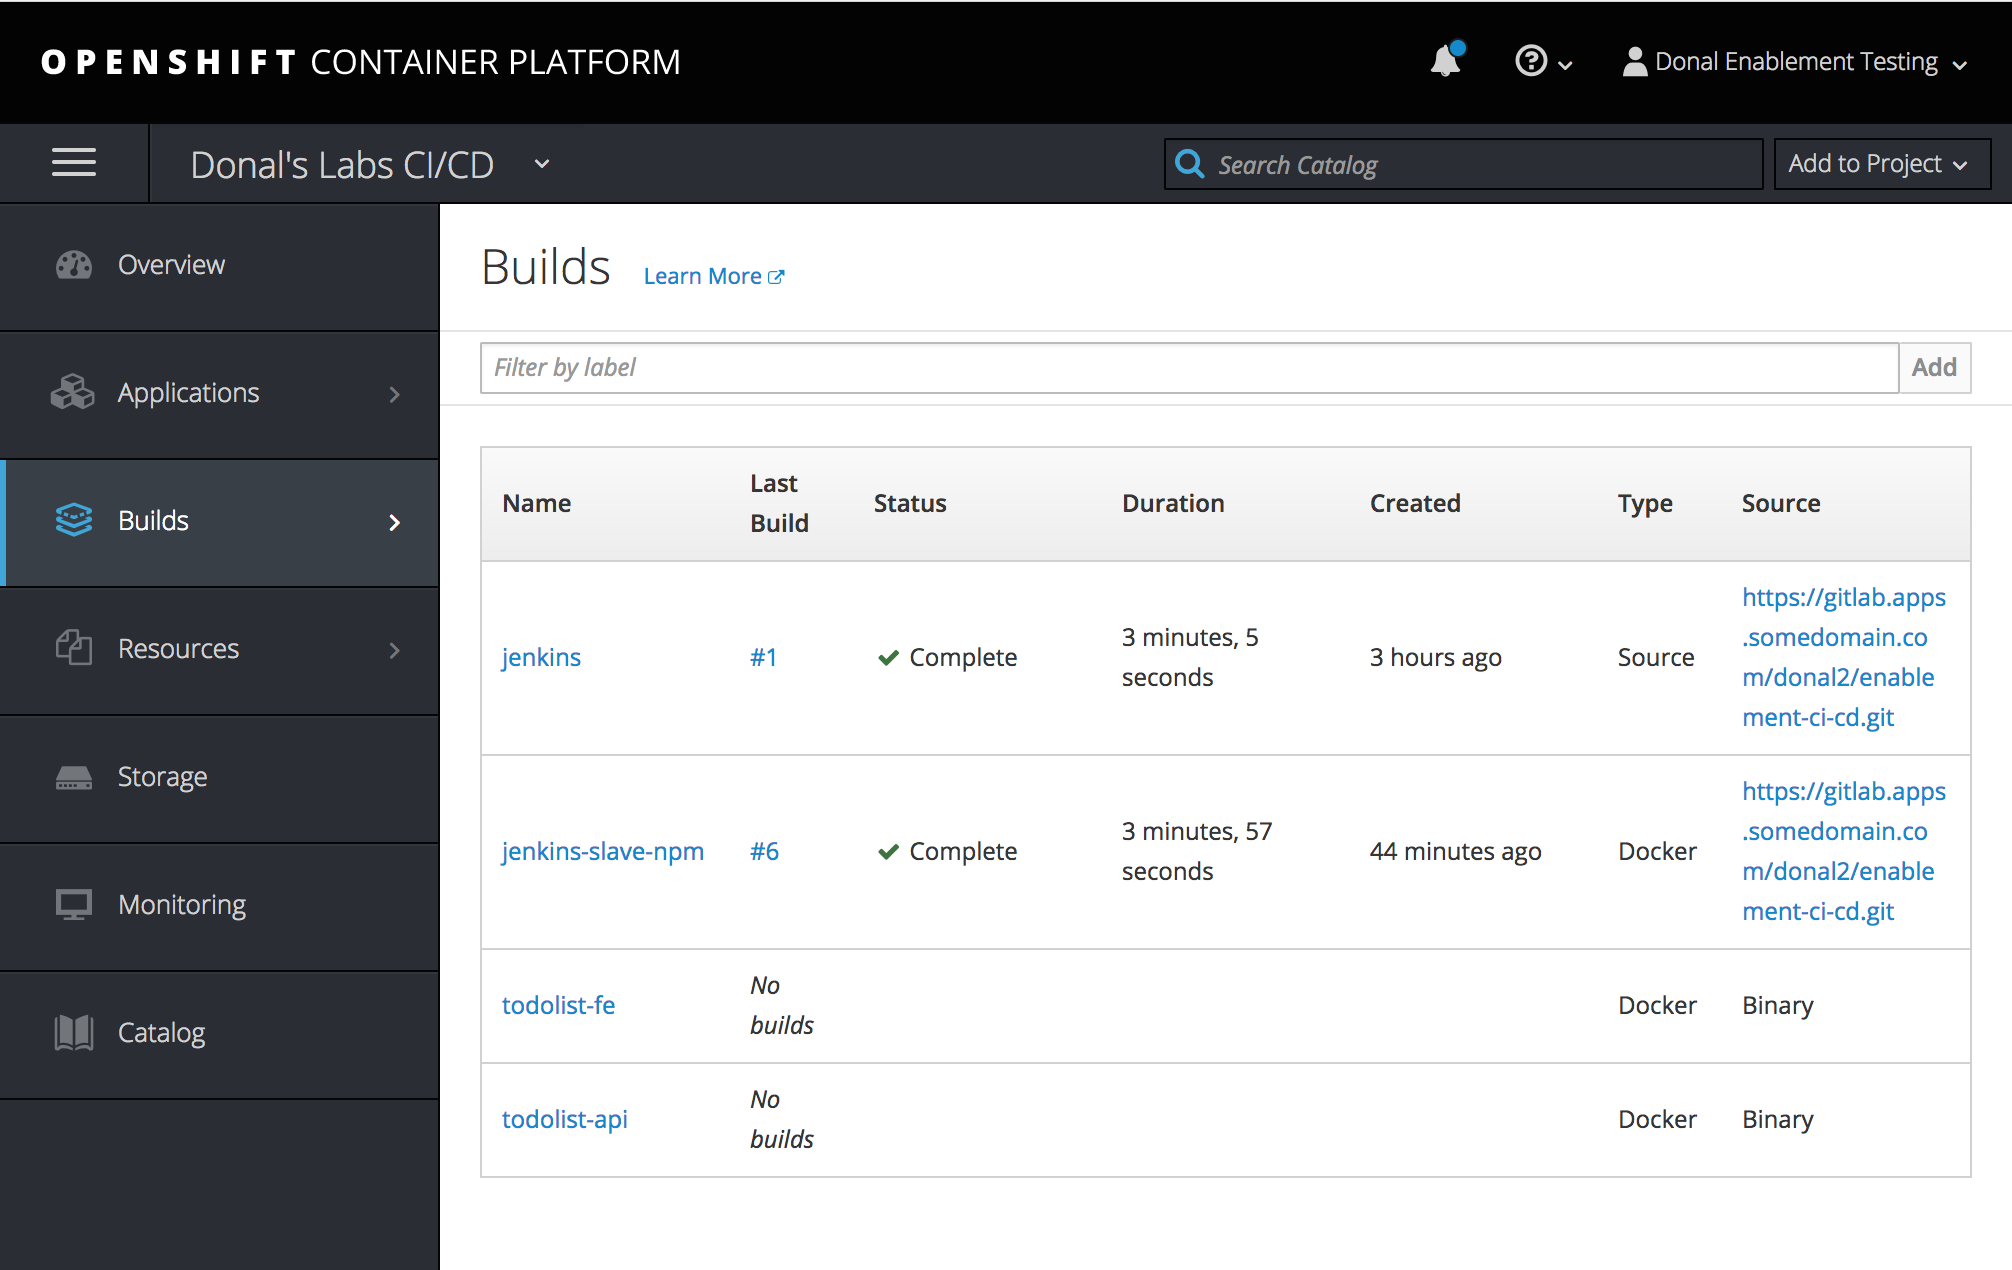
Check <YOUR_NAME>-dev to see the deployment configs are in place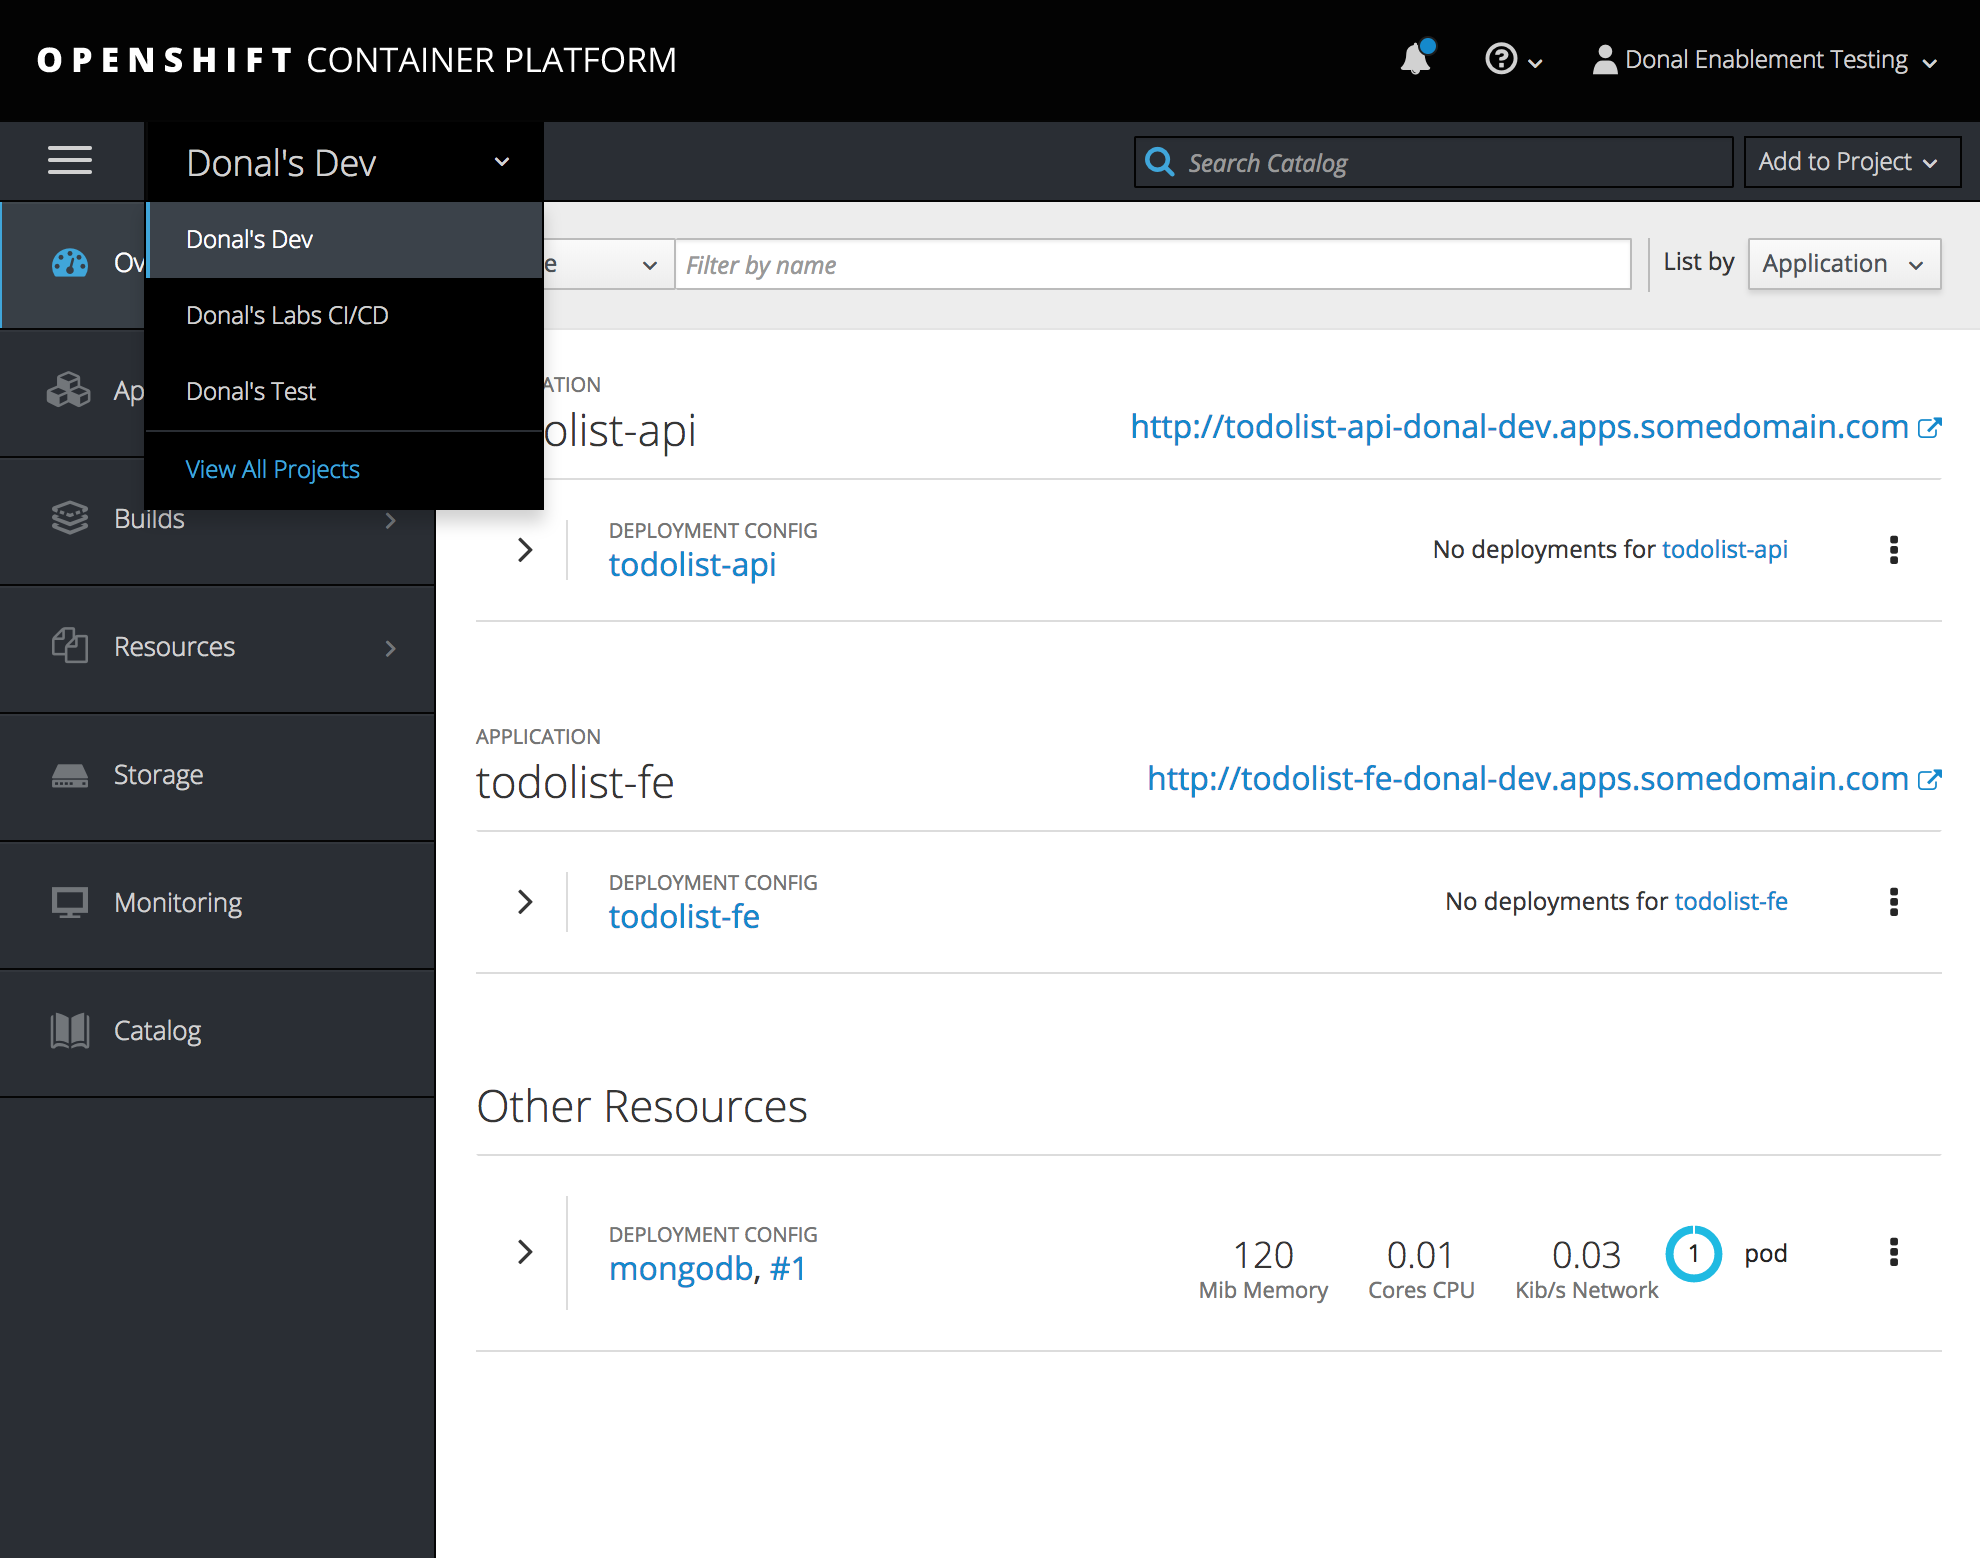
In this exercise; we take what we have working locally and get it working in OpenShift
This exercise will involve creating three stages (or items) in our pipeline, each of these is detailed below at a very high level. Move on to the next step to begin implementation.
* a build job is responsible for compiling and packaging our code:
1. Checkout from source code (develop for <yourname>-dev & master for <yourname>-test)
2. Install node dependencies and run a build / package
3. Send the package to Nexus
4. Archive the workspace to persist the workspace in case of failure
4. Tag the GitLab repository with the ${JOB_NAME}.${BUILD_NUMBER} from Jenkins. This is our ${BUILD_TAG} which will be used on downstream jobs.
5. Trigger the bake job with the ${BUILD_TAG} param
* a bake job should take the package and put it in a Linux Container
1. Take an input of the previous jobs ${BUILD_TAG} ie ${JOB_NAME}.${BUILD_NUMBER}.
2. Checkout the binary from Nexus and unzip its contents
3. Run an oc start-build of the App's BuildConfig and tag its imagestream with the provided ${BUILD_TAG}
4. Trigger a deploy job using the parameter ${BUILD_TAG}
* a deploy job should roll out the changes by updating the image tag in the DC:
1. Take an input of the ${BUILD_TAG}
2. Patch / set the DeploymentConfig to the image's ${BUILD_TAG}
3. Rollout the changes
4. Verify the deployment
* We will now go through these steps in detail.
do500-toolbox container. oc project <YOUR_NAME>-ci-cd
oc tag openshift/jenkins-slave-npm:latest jenkins-slave-npm:latest
oc label is jenkins-slave-npm role=jenkins-slave
With the BuildConfig and DeployConfig in place for both our apps (*-fe & *-api) from previous steps; Log into Jenkins and create a New Item. This is just jenkins speak for a new job configuration. 
Name this job dev-todolist-fe-build and select Freestyle Project. All our jobs will take the form of <ENV>-<APP_NAME>-<JOB_PURPOSE>. 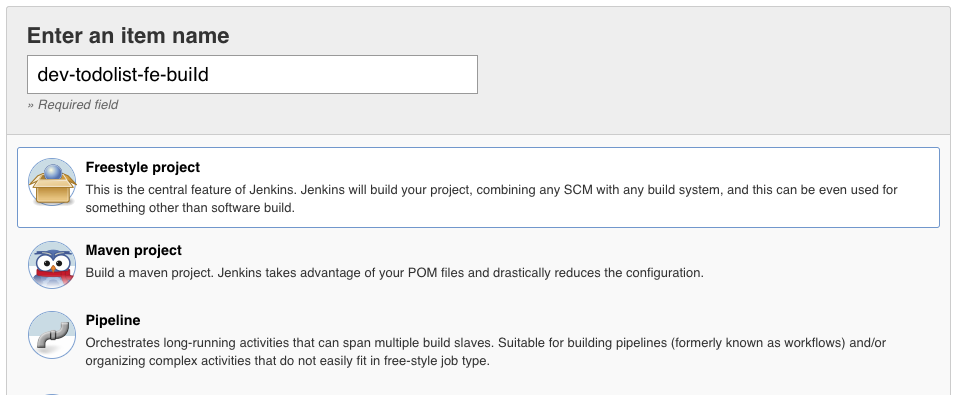
The page that loads is the Job Configuration page and it can be returned to at anytime from Jenkins. Let's start configuring our job. To conserve space; we will make sure Jenkins only keeps the last build's artifacts. Tick the Discard old builds checkbox, then Advanced and set Max # of builds to keep with artifacts to 1 as indicated below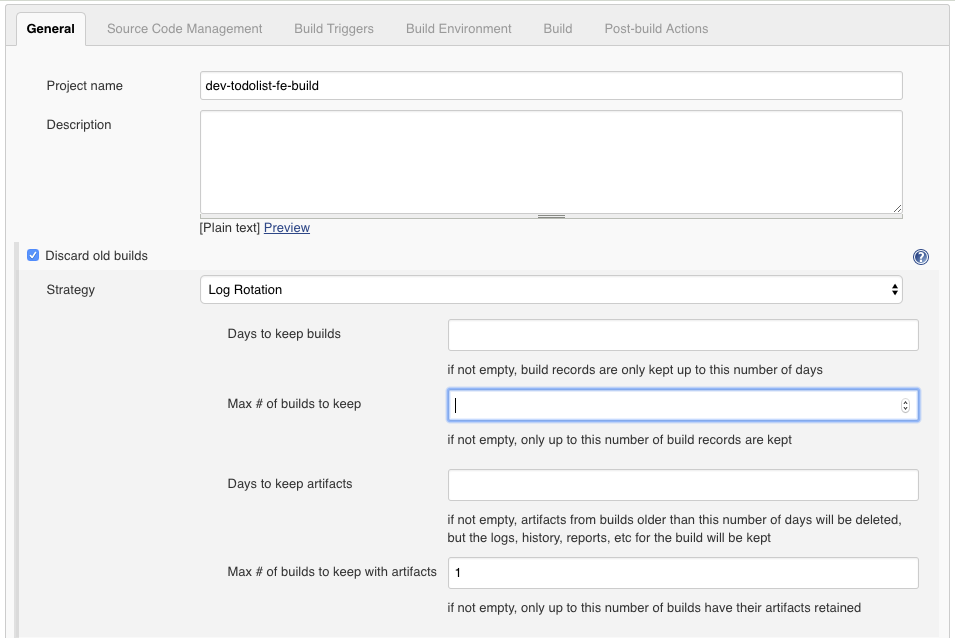
Our NodeJS build needs to be run on the jenkins-slave-npm we bought in in the previous chapter. Specify this in the box labelled Restrict where this project can be run 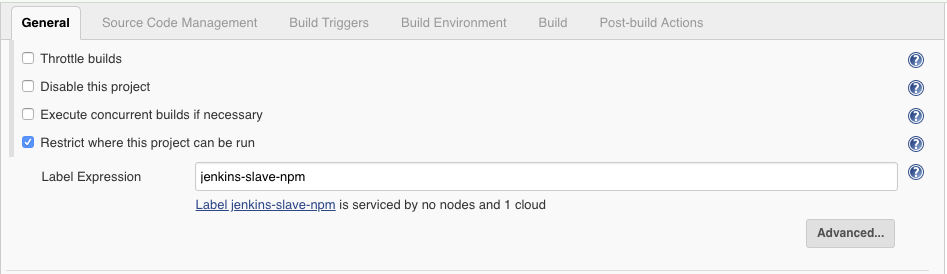
On the Source Code Management tab, select the Git radio button, specify the endpoint for our GitLab todolist-fe Project and specify your credentials from the dropdown box. Set the Branch Specifier to develop. 
Scroll down to the Build Environment tab and select the Color ANSI Console Output checkbox 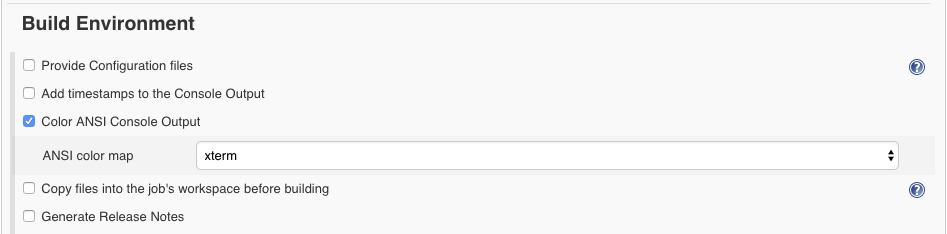
Move on to the Build section and select Add build step. From the dropdown select Execute Shell. On the box that appears; insert the following, to build package and deploy our app to Nexus:bash set -o xtrace npm install npm run build:ci:dev npm run package npm run publish 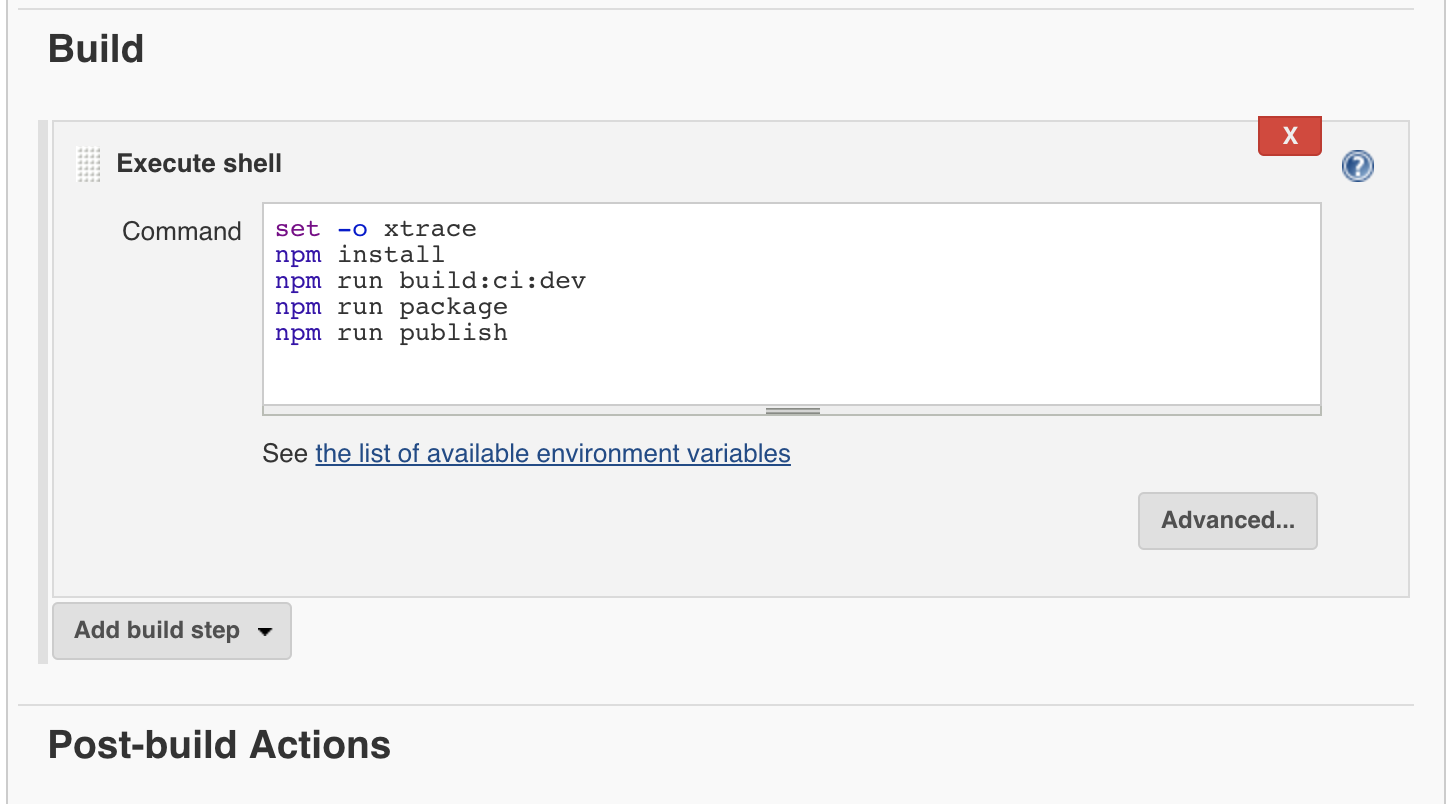
Scroll to the final section; the Post-build Actions. Add a new post-build action from the dropdown called Archive the artifacts and specify ** in the box. This will zip the entire workspace and copy it back to Jenkins for inspection if needed. 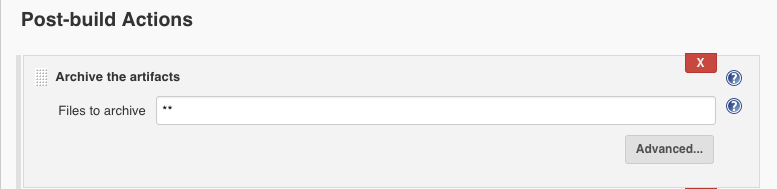
On the Post-build Actions; Add another post-build action from the dropdown called Git Publisher. This is useful for tying the git check-in to the feature in your tracking tool to the built product.
Push Only If Build Succeedsbash ${JOB_NAME}.${BUILD_NUMBER} bash Automated commit by jenkins from ${JOB_NAME}.${BUILD_NUMBER} Create New Tag and set Target remote name to origin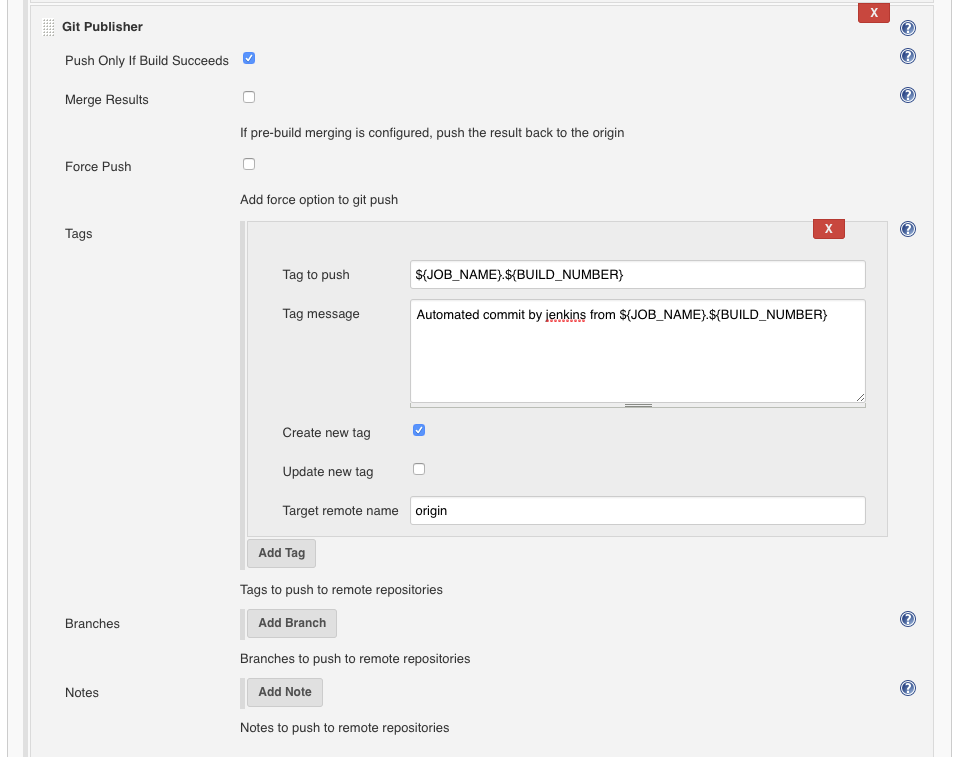
Finally; add the trigger for the next job in the pipeline. This is to trigger the bake job with the current build tag. Add another post-build action from the dropdown called Trigger parameterized build on other projects.
dev-todolist-fe-bakeStable or unstable but not failed.bash BUILD_TAG=${JOB_NAME}.${BUILD_NUMBER} 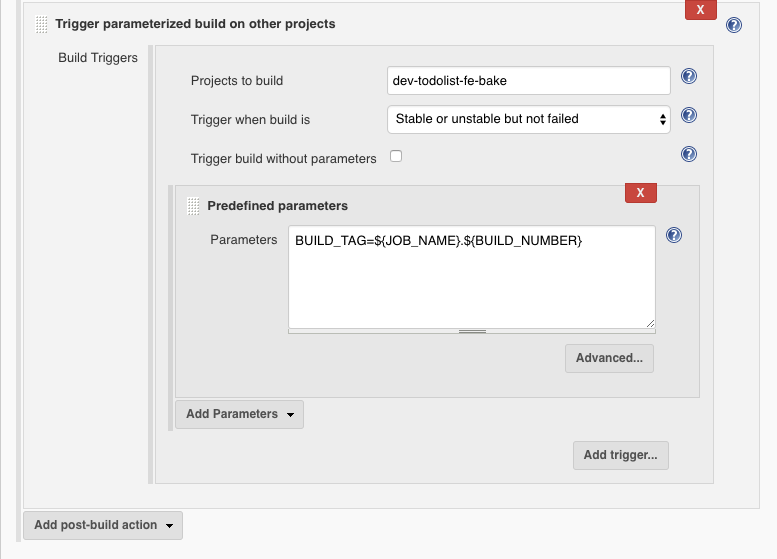
NOTE - Jenkins might say "No such project ‘dev-todolist-fe-bake’. Did you mean ...." at this point. Don't worry; it's because we have not created the next job yet.
Hit save which will take you to the job overview page - and that's it; our build phase is complete!
Next we will setup our bake phase; which is a little simpler. Go to Jenkins home and create another Freestyle Job (as before) called dev-todolist-fe-bake.
This job will take in the BUILD_TAG from the previous one so check the This project is parameterized box on the General tab.
BUILD_TAG. This will be available to the job as an Enviroment Variable.dev-todolist-fe-build. as the default value for ease when triggering manually.${JOB_NAME}.${BUILD_NUMBER} of previous build e.g. dev-todolist-fe-build.1232
NOTE - Don't forget to include the . after dev-todolist-fe-build in the Default Value box.
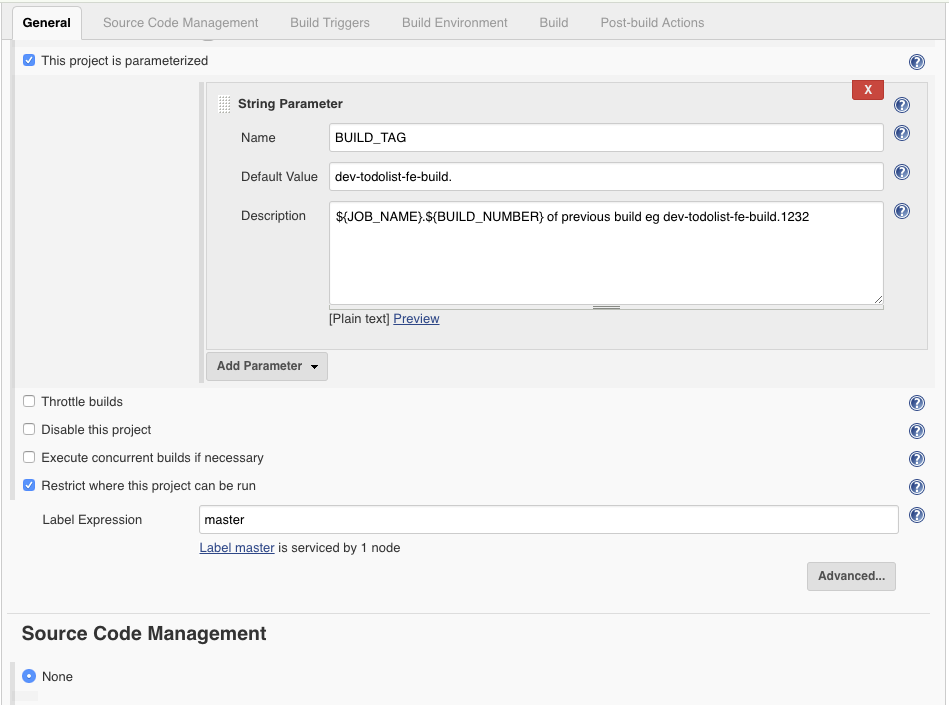
This time set the Restrict where this project can be run label to master.
NOTE - Master is the default node that jobs run on. We don't want jenkins to execute the bake on any other nodes if the master is busy so it is always safer to specify it here.
There is no Git or SCM needed for this job so move down to the Build Environment and tick Delete workspace before build starts
Scroll down to the Build Environment tab and select the Color ANSI Console Output checkbox 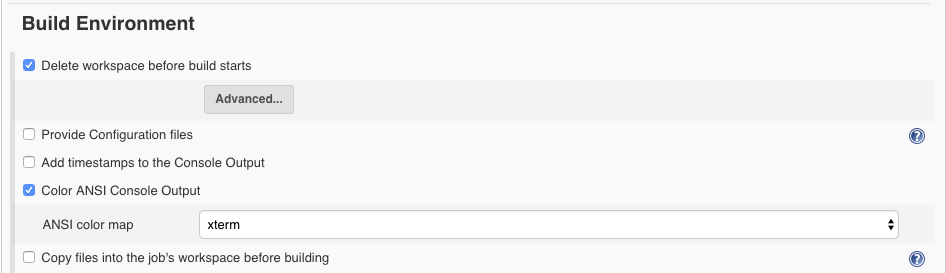
Move on to the Build section and select Add build step. From the dropdown select Execute Shell. On the box the appears; insert the following, to pull the package from Nexus. We patch the BuildConfig with the Jenkins Tag to get traceablility from feature to source code to built item. Finally; the oc start-build command is run:
Remember to replace <YOUR_NAME> accordingly.bash #!/bin/bash curl -v -f \ http://admin:admin123@${NEXUS_SERVICE_HOST}:${NEXUS_SERVICE_PORT}/repository/zip/com/redhat/todolist/${BUILD_TAG}/package-contents.zip \ -o package-contents.zip unzip package-contents.zip oc project <YOUR_NAME>-ci-cd NAME=todolist-fe oc patch bc ${NAME} -p "{\"spec\":{\"output\":{\"to\":{\"kind\":\"ImageStreamTag\",\"name\":\"${NAME}:${BUILD_TAG}\"}}}}" oc start-build ${NAME} --from-dir=package-contents/ --follow 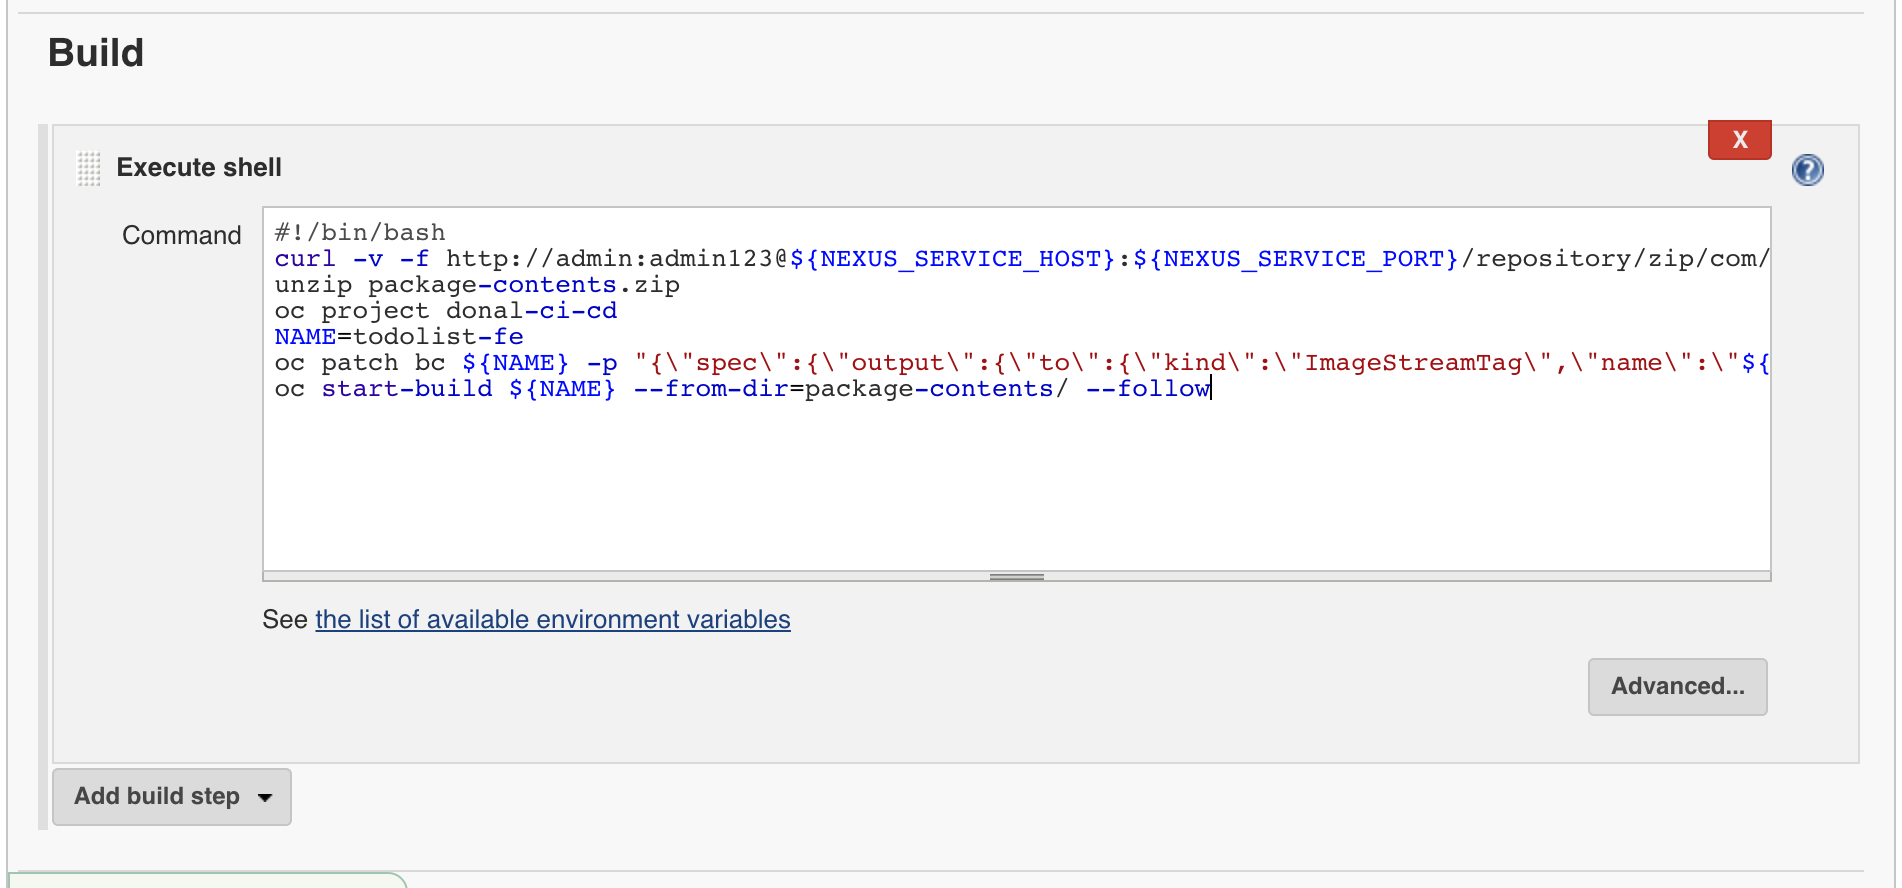
Finally; add the trigger for the next job in the pipeline. Add a post-build action from the dropdown called Trigger parameterized build on other projects.
dev-todolist-fe-deployStable.Current build parameters. This will pass the ${BUILD_TAG} to the downstream job which we will create next.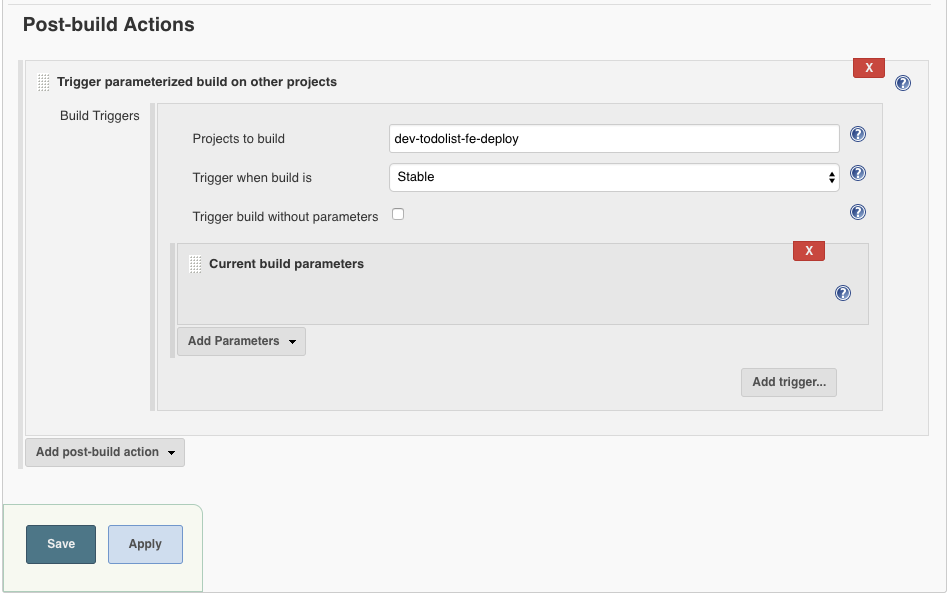
Hit save! That's our bake phase done! Finally; on to our deploy
Next we will setup our deploy phase. This job is very similar in setup to the bake phase so this time go to Jenkins home and create dev-todolist-fe-deploy Job but scroll to the bottom and Copy from dev-todolist-fe-bake.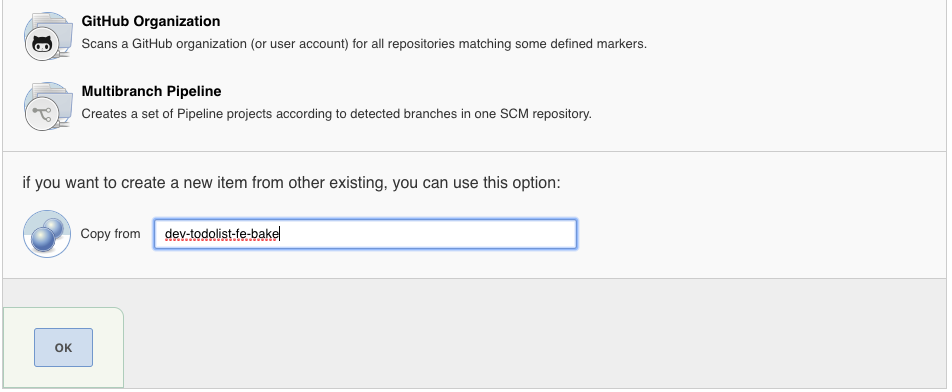
The only two differences between these jobs is the Build Step and there are no Post Build Actions. First to the Build tab and add the following to the shell box. The process for running the deploy is to tag the image created previously for use in the ci-cd namespace for use in the dev project. Then update the DeploymentConfig to use the Jenkins Tag which kicked the process off. Once successful; the changes are rolled out. Remember to change <YOUR_NAME> accordingly.bash #!/bin/bash set -o xtrace # VARS PIPELINES_NAMESPACE=<YOUR_NAME>-ci-cd NAMESPACE=<YOUR_NAME>-dev NAME=todolist-fe oc project ${NAMESPACE} oc tag ${PIPELINES_NAMESPACE}/${NAME}:${BUILD_TAG} ${NAMESPACE}/${NAME}:${BUILD_TAG} oc set env dc ${NAME} NODE_ENV=dev oc set image dc/${NAME} ${NAME}=docker-registry.default.svc:5000/${NAMESPACE}/${NAME}:${BUILD_TAG} oc rollout latest dc/${NAME} 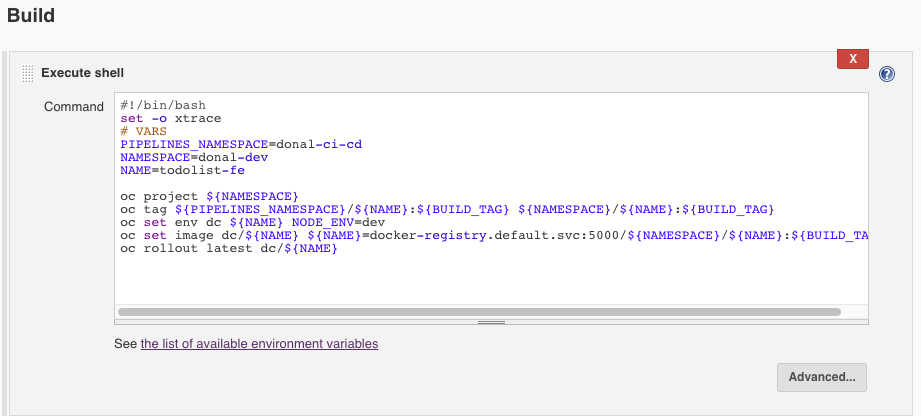
When a deployment has completed; OpenShift can verify its success. Add another step by clicking the Add build Step on the Build tab then Verify OpenShift Deployment including the following:
<YOUR_NAME>-devtodolist-fe1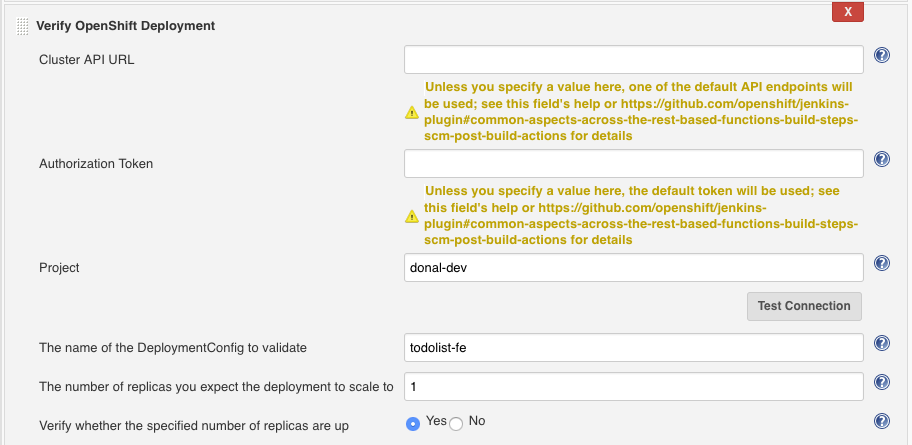
Delete the Post Build Action to trigger another job (by hitting the red X). Save the configuration. We're almost ready to run the pipeline!
Since we are using self-signed certificates for the Git server instance in the lab, you need to set some global environment variables in the Jenkins configuration to bypass SSL certificate verification and git client configuration
Manage Jenkins > Configure System and then scroll down to the Git plugin section and add your username and email as follows:
jenkins-slave-npm section under Kubernetes Pod Template and add add a new environment variable called GIT_SSL_NO_VERIFY and set its value to true: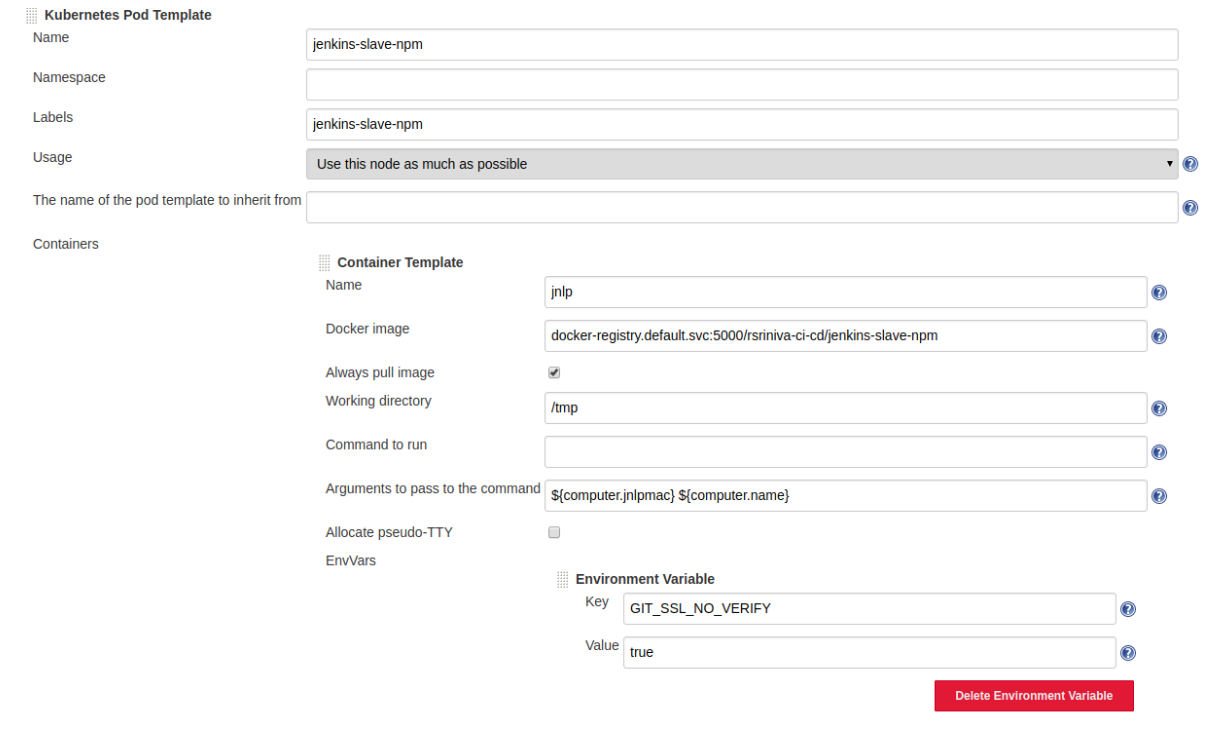
Save at the bottom of the page to save your global settings.With our Jenkins setup in place; now move to our todolist-fe app's source code. We have to add our configuration to the frontend to tell it where the API layer will be hosted. Open the source in your favourite editor and navigate to src/config/dev.js.
Update <YOUR_NAME> accordingly with the route where the Todo List API will live when it is deployed. The correct full URL can also be found on the OpenShift Console; if you copy it from there remember to append /api/todos to the URL. For example:
Repeat this for src/config/test.js file. If you copy the URL from the previous step; change dev to test.
For example:
With the config in place; commit your changes and push them to GitLab:bash git add . bash git commit -m "ADD config for api" bash git push
Back on Jenkins; We can tie all the jobs in the pipeline together into a nice single view using the Build Pipeline view. Back on the Jenkins home screen Click the + beside the all tab on the top.
On the view that loads; Give the new view a sensible name like dev-todolist-fe-pipeline and select Build Pipeline View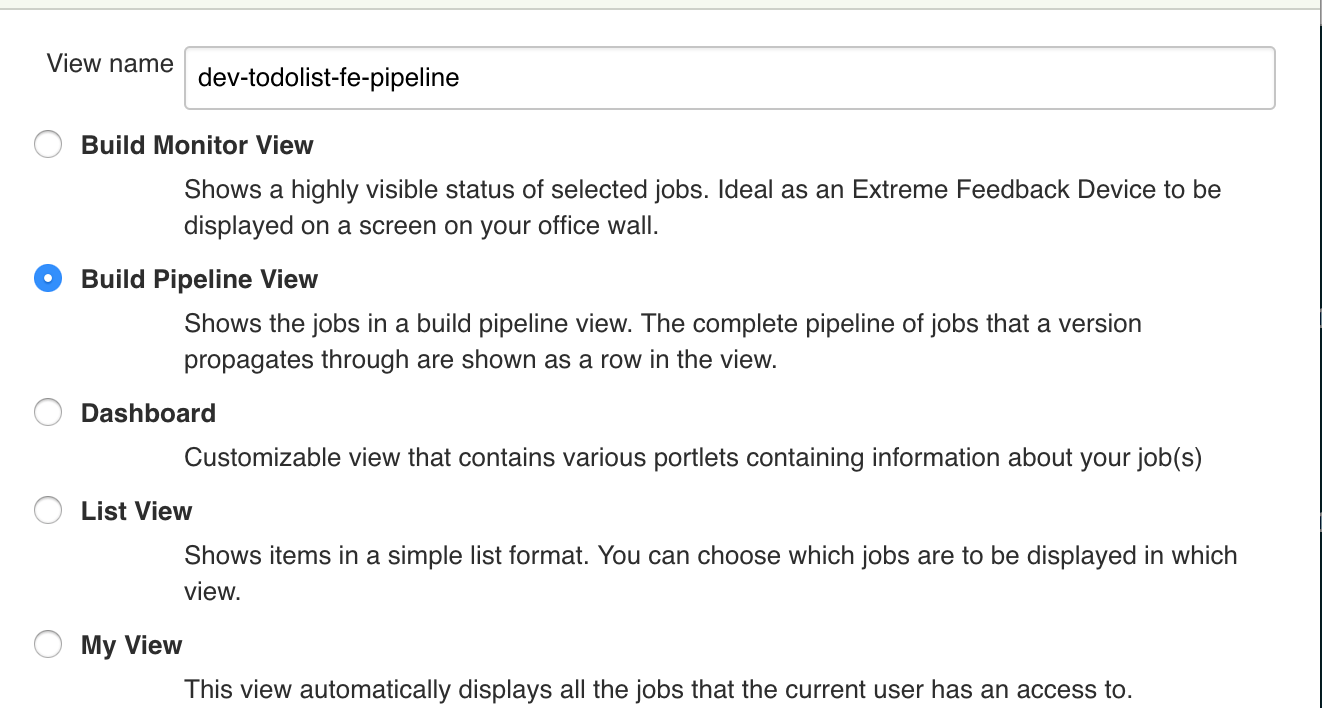
Set the Pipeline Flow's Inital Job to dev-todolist-fe-build and save.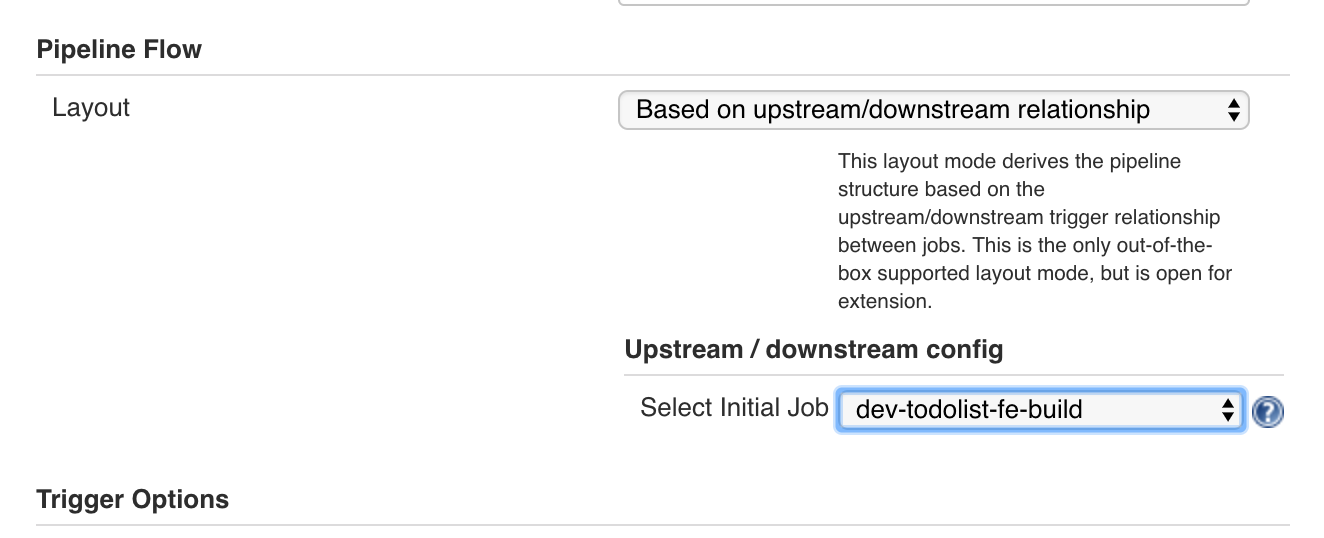
You should now see the pipeline view. Run the pipeline by hitting run (you can move onto the next part while it is running as it may take some time).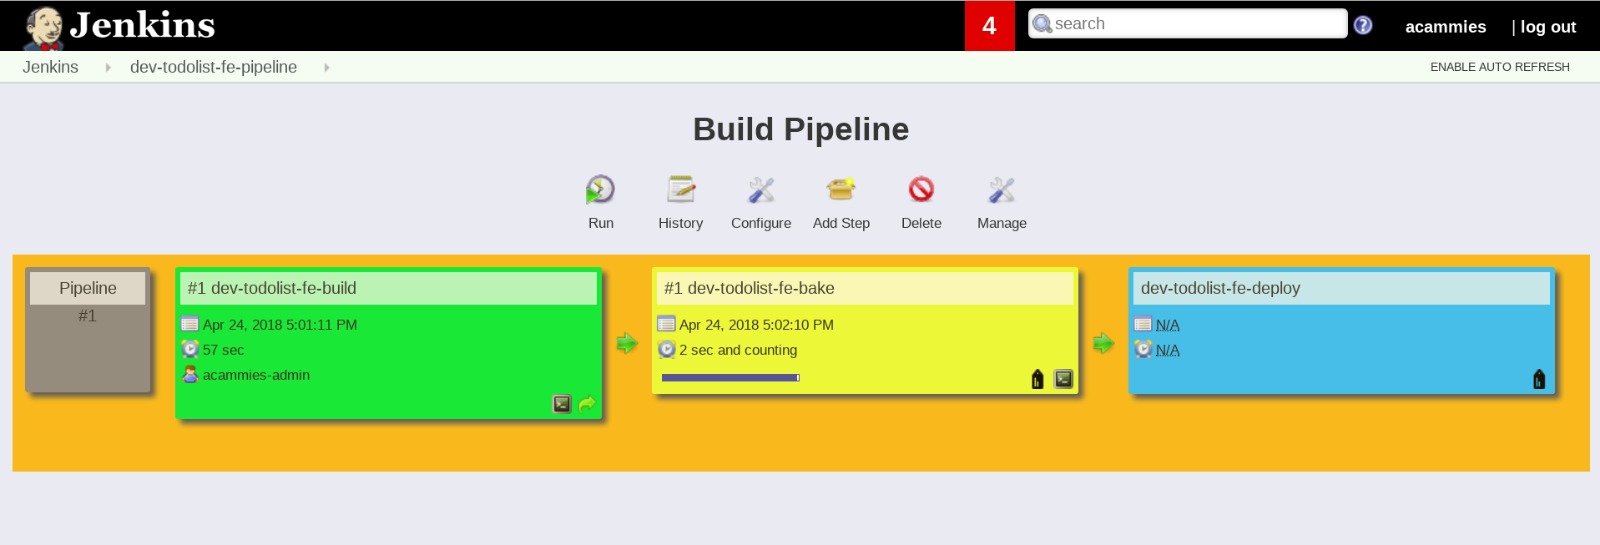
NOTE - The pipeline may fail on the first run. In such cases, re-run the pipeline once more and the three stages will run successfully and show three green cards.
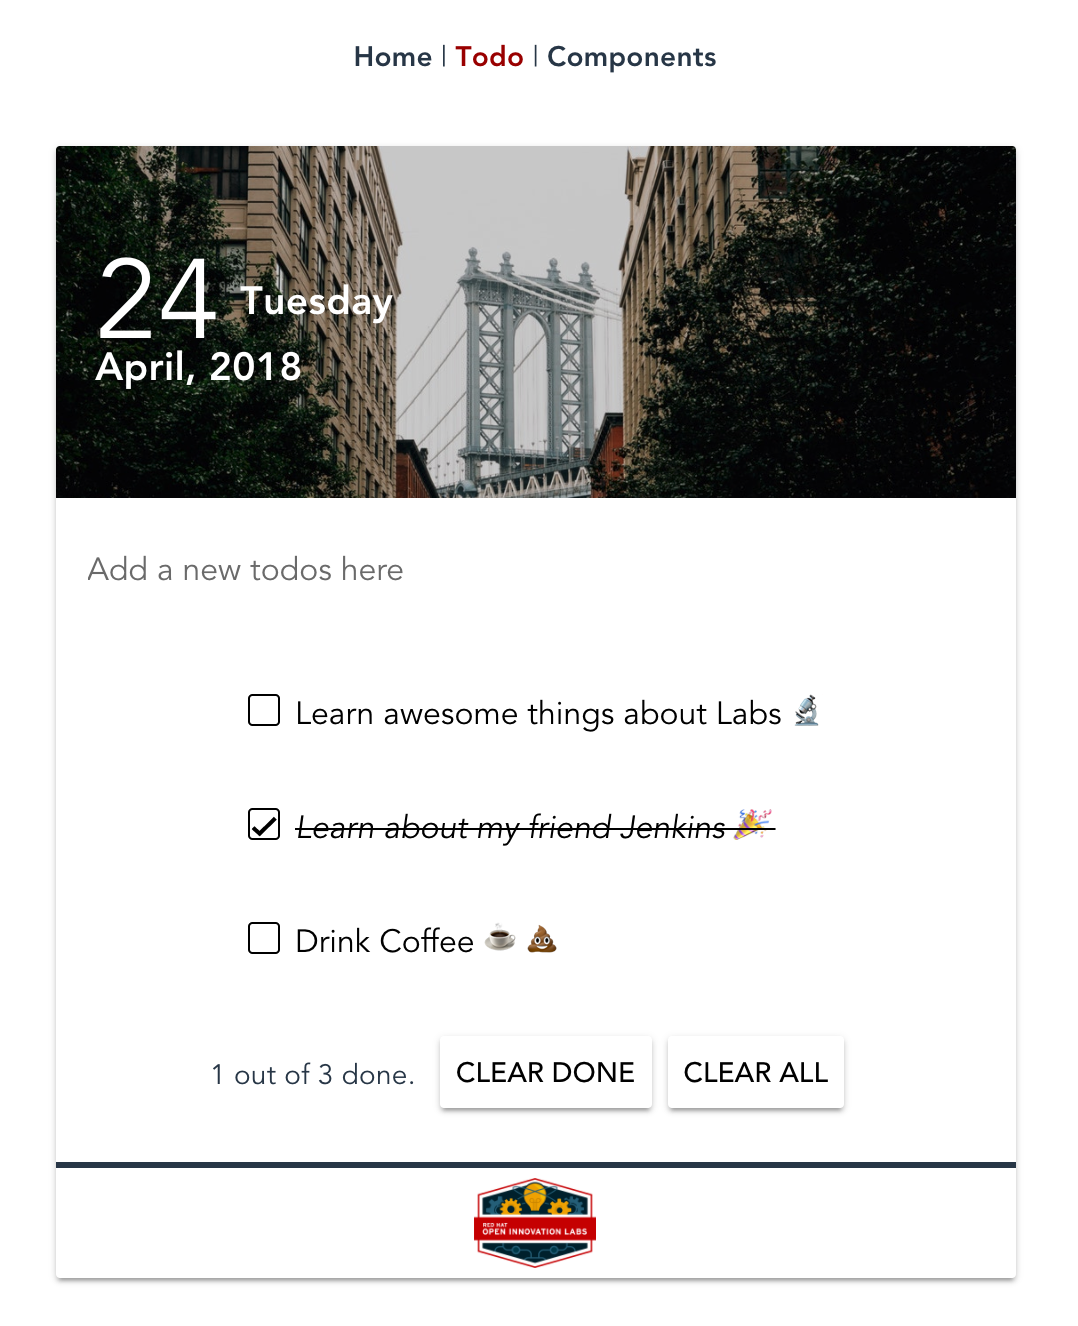
To check the deployment in OpenShift; open the web console and go to your dev namespace. You should see the deployment was successful; hit the URL to open the app (the screenshot below has both apps deployed).
If it has been a success we should see our dummyData. This is because there is no backend deployed, in later labs we will deploy the backend and the mongodb for persistence but to do this we will use Jenkins Pipeline as code.