In this exercise we'll break free from the chains of point'n'click Jenkins by introducing pipeline as code in the form of
Jenkinsfile. Following this we will introduce some new Jenkins slaves that will be used in later exercises.
There are a number of ways pipeline as code can be achieved in Jenkins.
The Job DSL Plugin - this is a slightly older but very functional DSL mechanism to create reusable pipelines. Create a groovy file to run Jenkins Domain Specific Language to create jobs, functions and other items. In Jenkins; you then can execute this file which will build all of the config.xml files needed for each Job.
The Scripted Pipeline - The scripted pipeline introduced the Jenkinsfile and the ability for developers to write their Jenkins setup as groovy code. A repo with a Jenkinsfile in its root can be pointed to by Jenkins and it will automatically build out each of the stages described within. The scripted pipeline is ultimately Groovy at its core.
The Declarative Pipeline - This approach looks to simplify and opinionate what you can do and when you can do it in a pipeline. It does this by giving you top level block which define sections, directives and steps. The declarative syntax is not run as groovy but you can execute groovy inside script blocks. The advantage of it over scripted is validation of the config and lighter approach with requirement to understand all of the groovy syntax
As a learner you will be able to
- Use a Jenkinsfile to create a declarative pipeline to build, bake and deploy the Todolist App
- Identify the differences between scripted, declarative and DSL pipelines
- Create Jenkins slave nodes for use in builds in future exercises
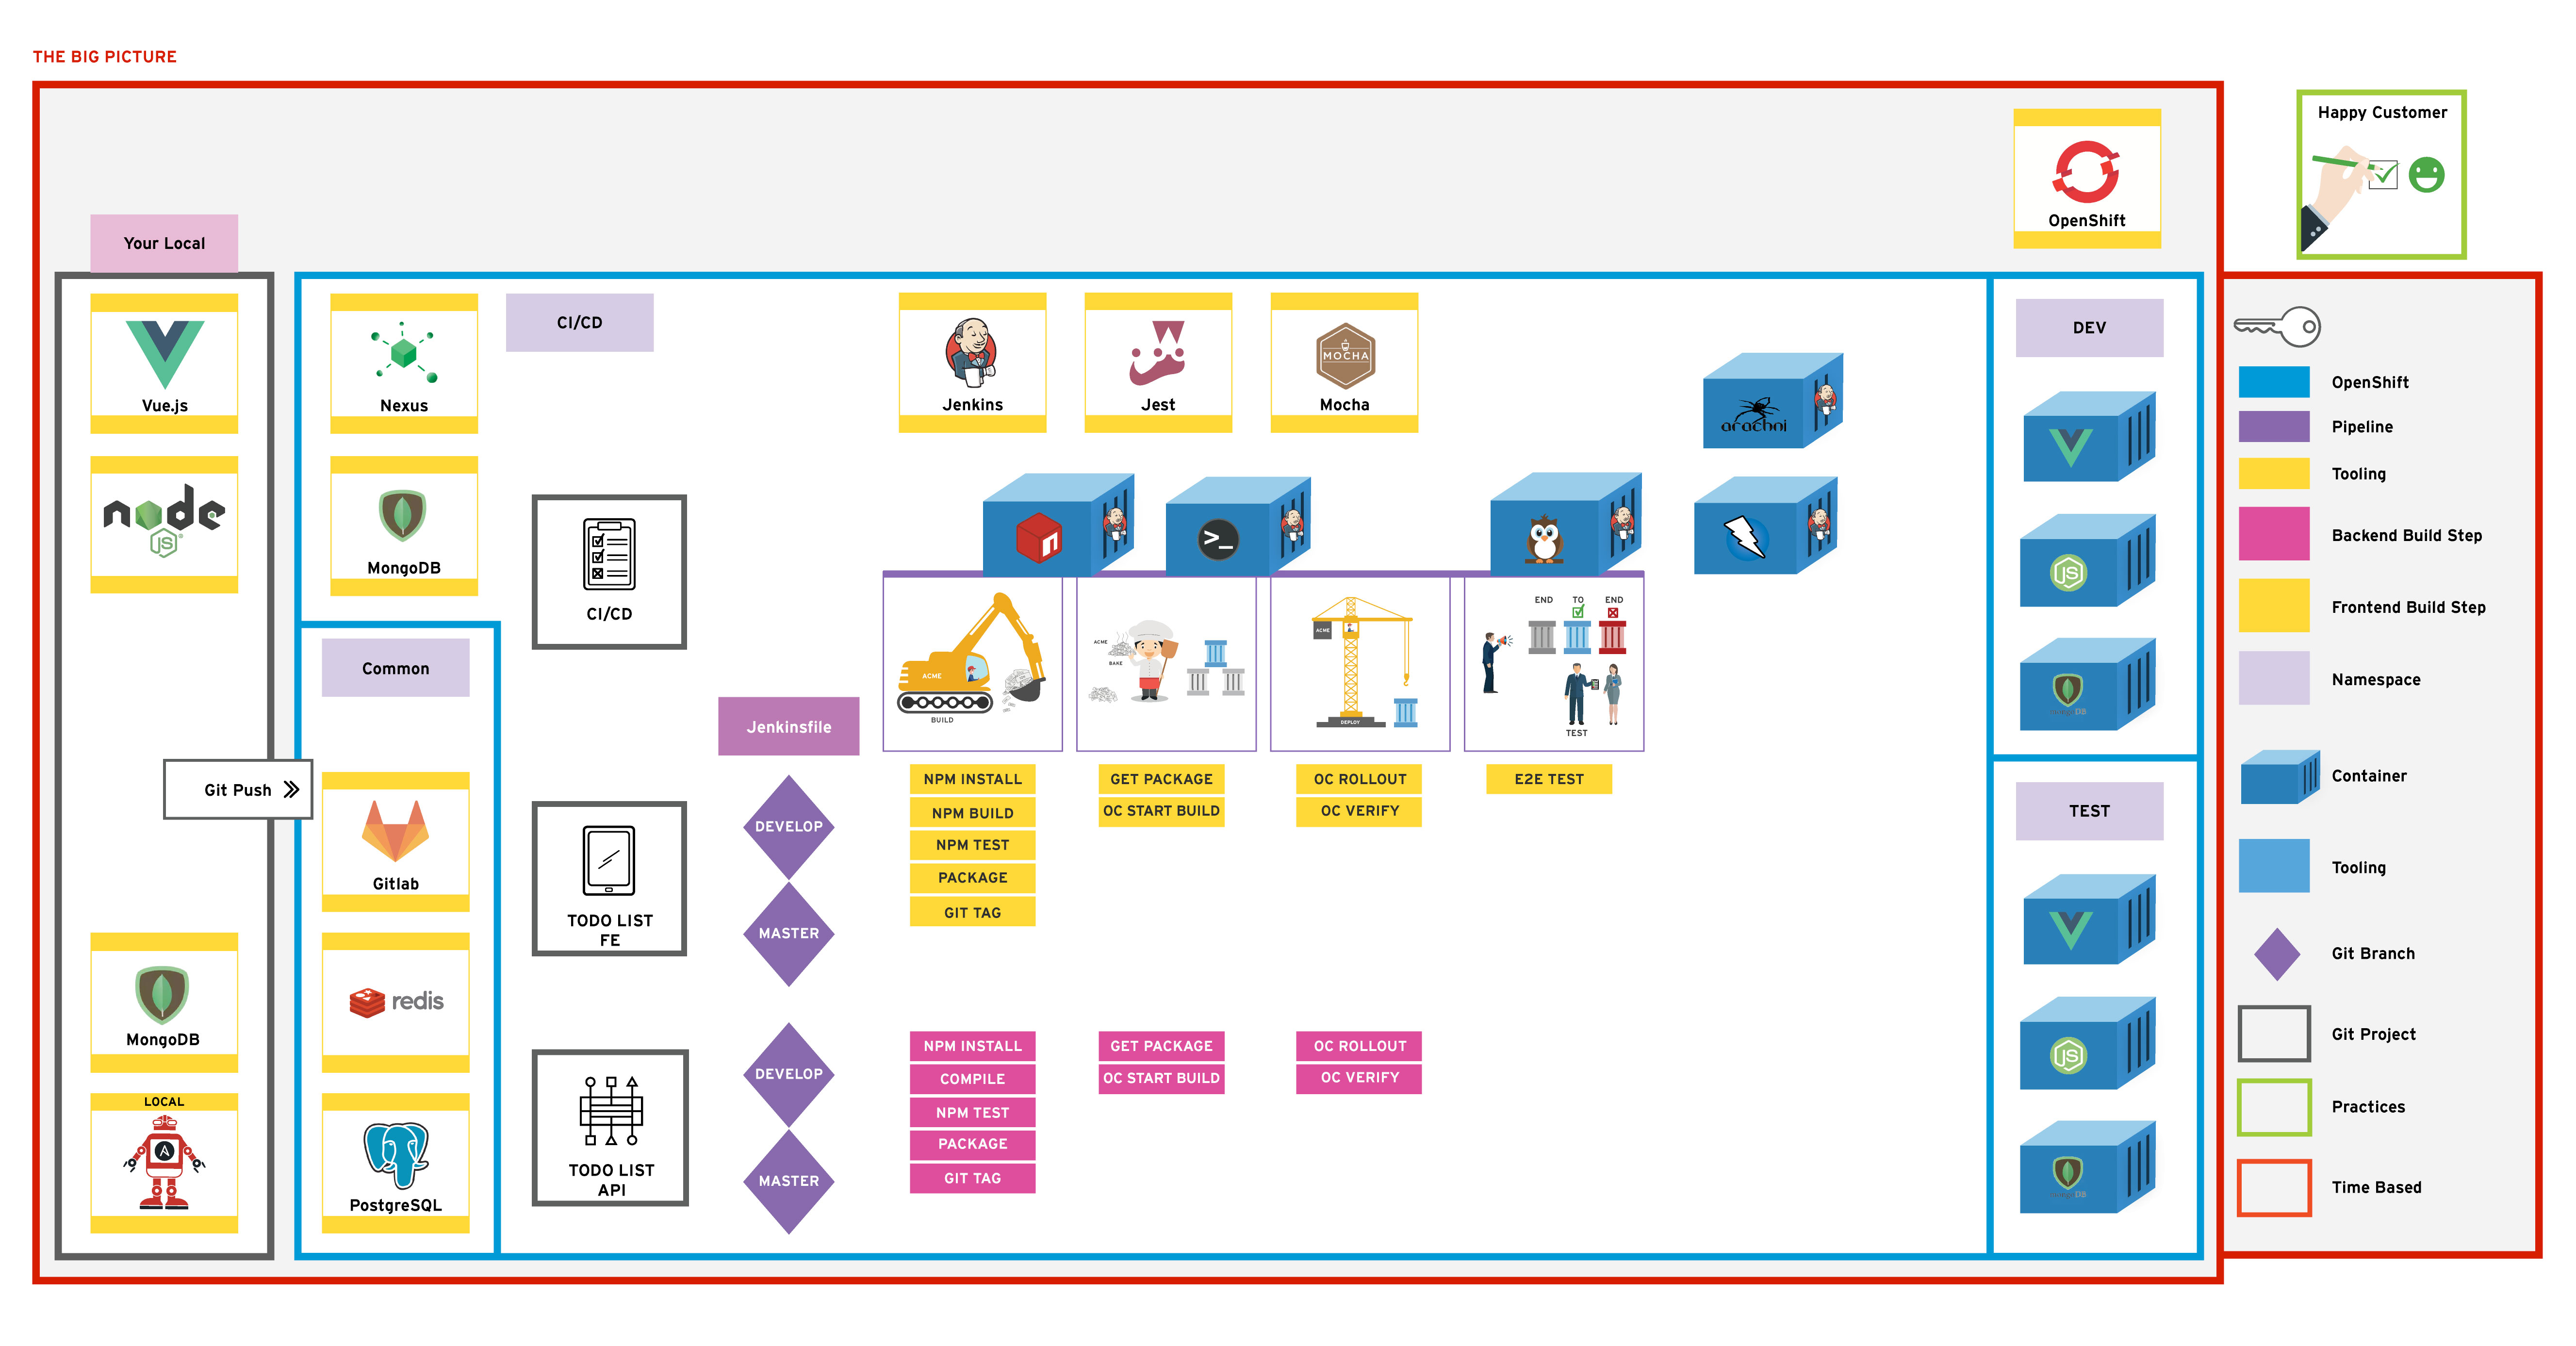
From the previous exercise; we gated our pipeline. Now we will add a pipeline-as-code in the form of the Jenkinfile and re-use it on the Backend too.
In this exercise we'll replace the Pipeline we created in the previous exercise with a Jenkinsfile approach
On your terminal navigate to your todolist-api project and checkout the pipeline feature branch that's been already created for you.bash cd todolist-api bash git checkout feature/jenkinsfile
Open up your todolist-api application in your favourite editor and move to the Jenkinsfile in the root of the project. The high-level structure of the file is shown collapsed below.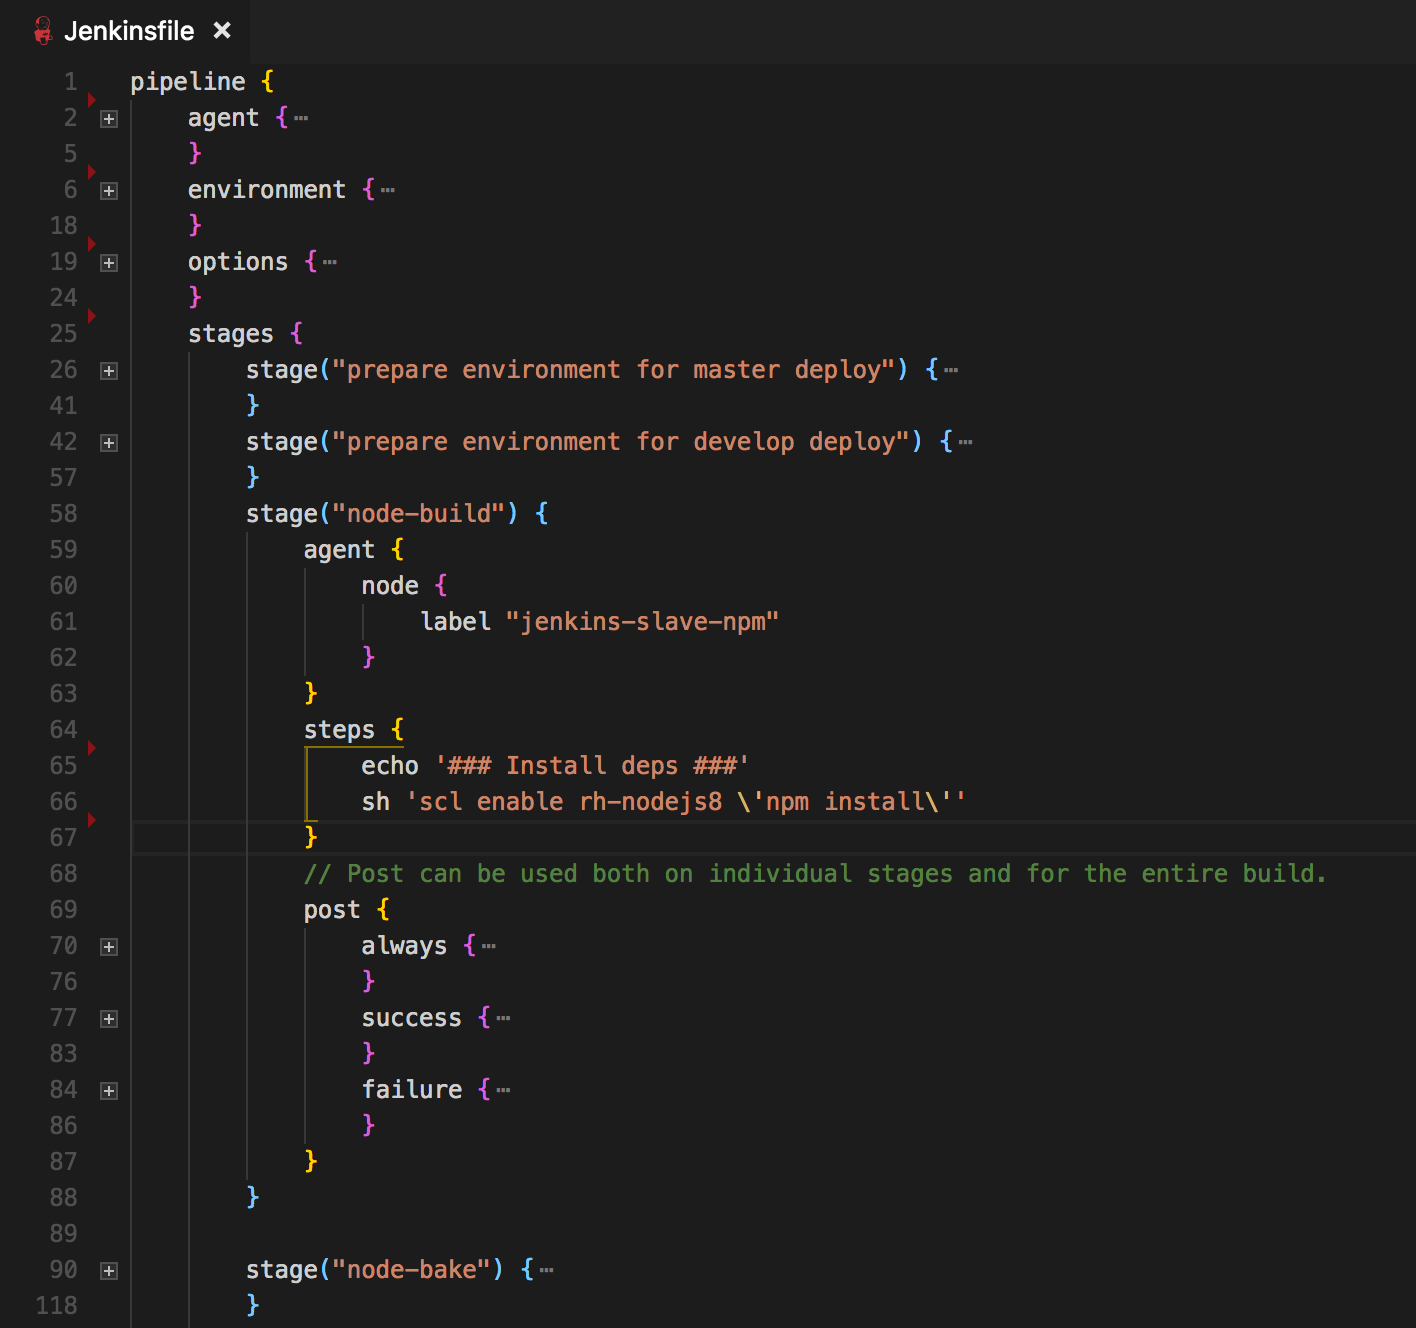
Some of the key things to note:
pipeline {} is how all declarative Jenkins pipelines begin.environment {} defines environment variables to be used across all build stagesoptions {} contains specific Job specs you want to run globally across the jobs e.g. setting the terminal colourstage {} all jobs must have one stage. This is the logical part of the build that will be executed e.g. bake-imagesteps {} each stage has one or more steps involved. These could be execute shell or git checkout etc.agent {} specifies the node the build should be run on e.g. jenkins-slave-npmpost {} hook is used to specify the post-build-actions. Jenkins declarative pipeline syntax provides very useful callbacks for success, failure and always which are useful for controlling the job flowwhen {} is used for flow control. It can be used at the stage level and be used to stop pipeline entering that stage. e.g. when branch is master; deploy to test environment.The Jenkinsfile is mostly complete to do all the testing etc that was done in previous exercises. Some minor changes will be needed to orchestrate namespaces. Find and replace all instances of <YOUR_NAME> in the Jenkinsfile. Update the <GIT_USERNAME> to the one you login to the cluster with; this variable is used in the namespace of your git projects when checking out code etc. Ensure the GITLAB_DOMAIN matches your git host.
```groovy
environment {
// GLobal Vars
PIPELINES_NAMESPACE = "-ci-cd"
APP_NAME = "todolist-api"
JENKINS_TAG = "${JOB_NAME}.${BUILD_NUMBER}".replace("/", "-")
JOB_NAME = "${JOB_NAME}".replace("/", "-")

GIT_SSL_NO_VERIFY = true
GIT_CREDENTIALS = credentials('jenkins-git-creds')
GITLAB_DOMAIN = "gitlab.<APPS_URL>"
GITLAB_PROJECT = "<GIT_USERNAME>"
With these changes in place, push your changes to the feature/jenkinsfile branch.bash git add Jenkinsfile bash git commit -m "ADD - namespace and git repo to pipeline" bash git push
When the changes have been successfully pushed; Open Jenkins.
Create a New Item on Jenkins. Give it the name todolist-api and select Multibranch Pipeline from the bottom of the list as the job type.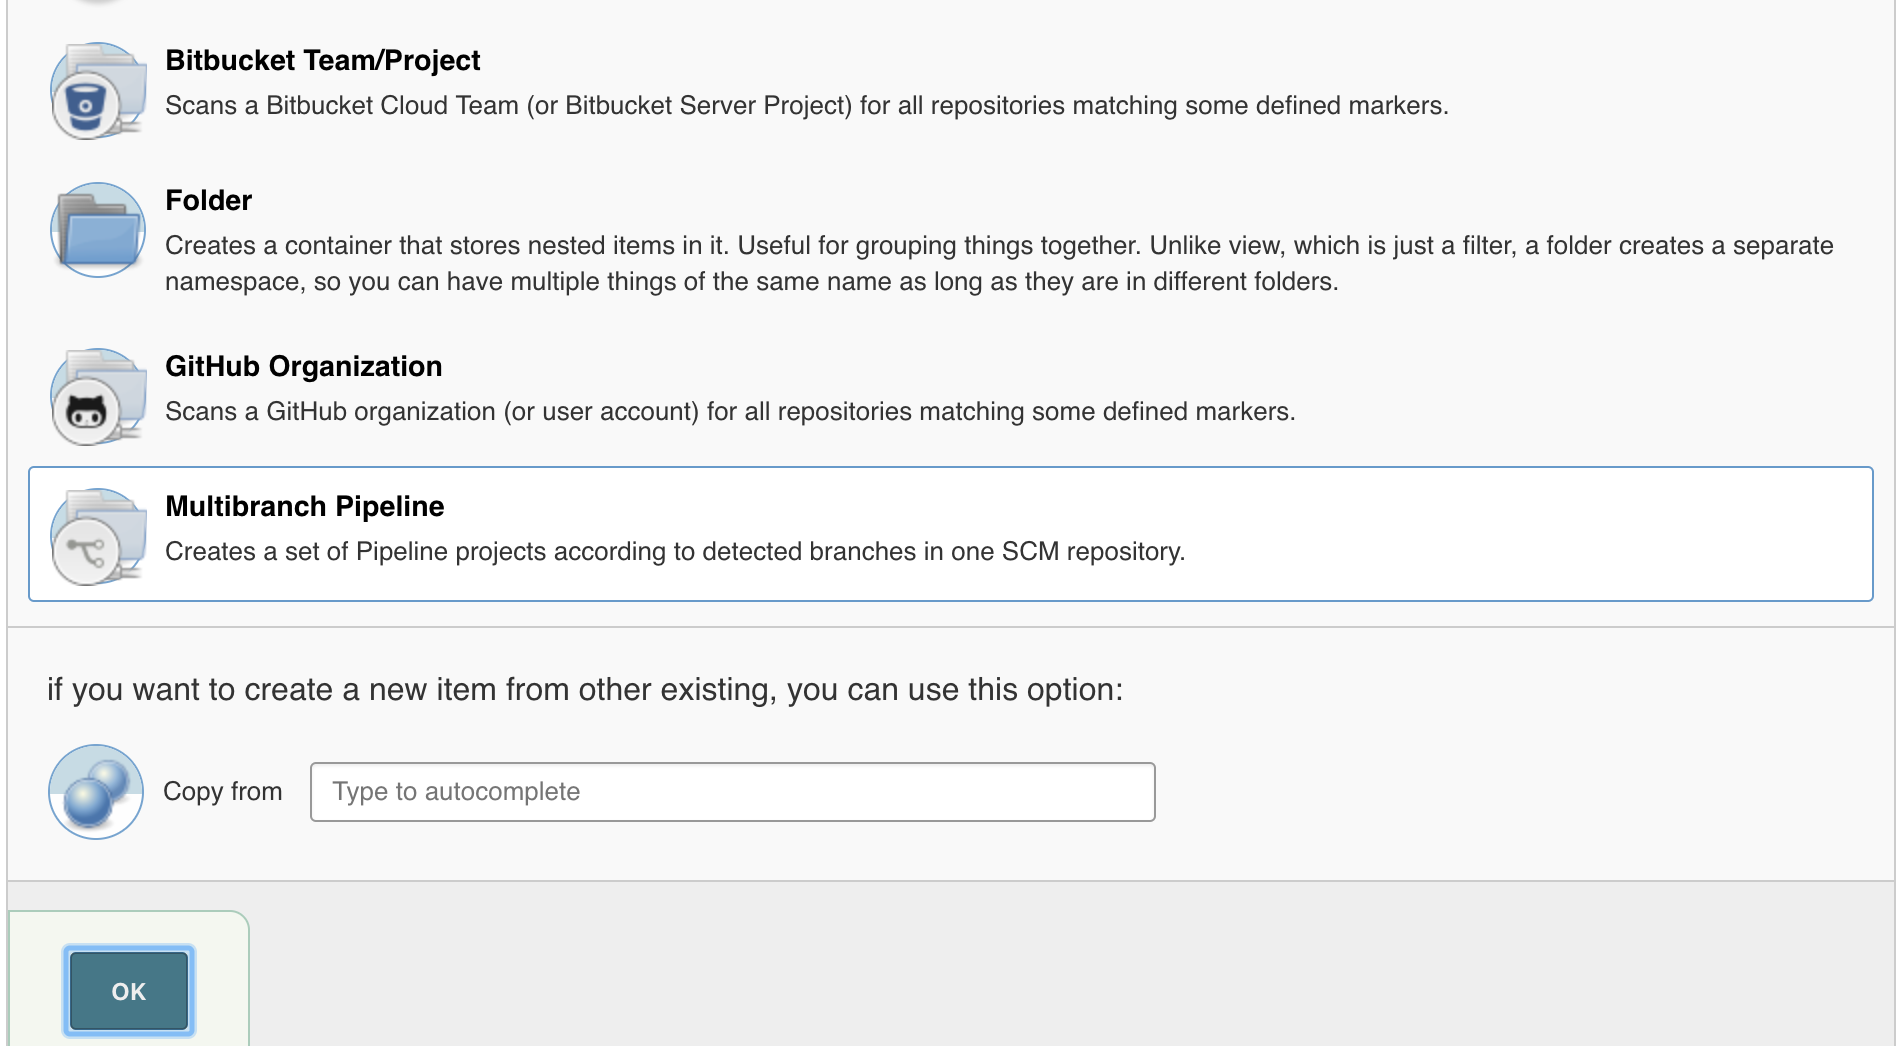
On the job's configure page; set the Branch Sources to git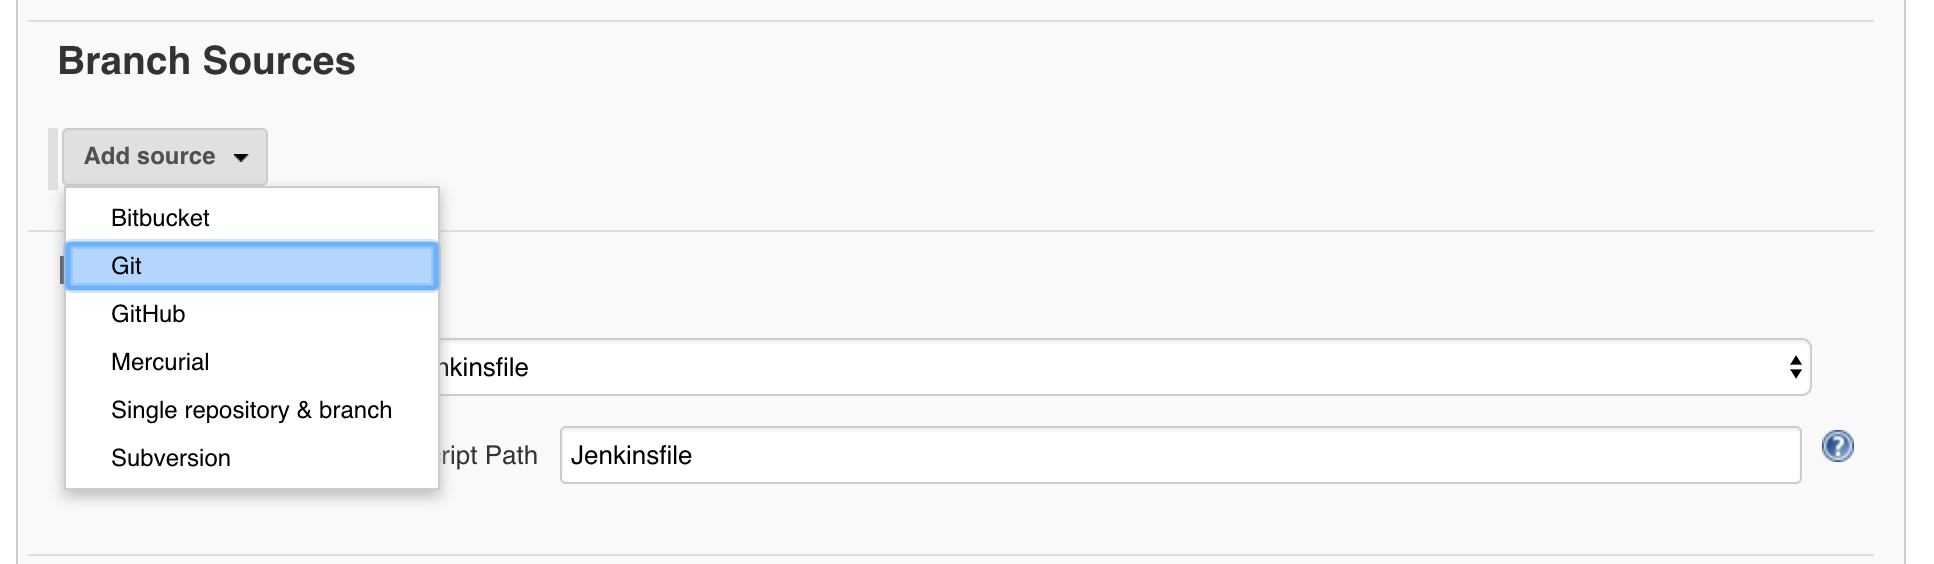
Fill in the Git settings with your todolist-api GitLab url and set the credentials as you've done before. https://gitlab.<APPS_URL>/<YOUR_NAME>/todolist-api.git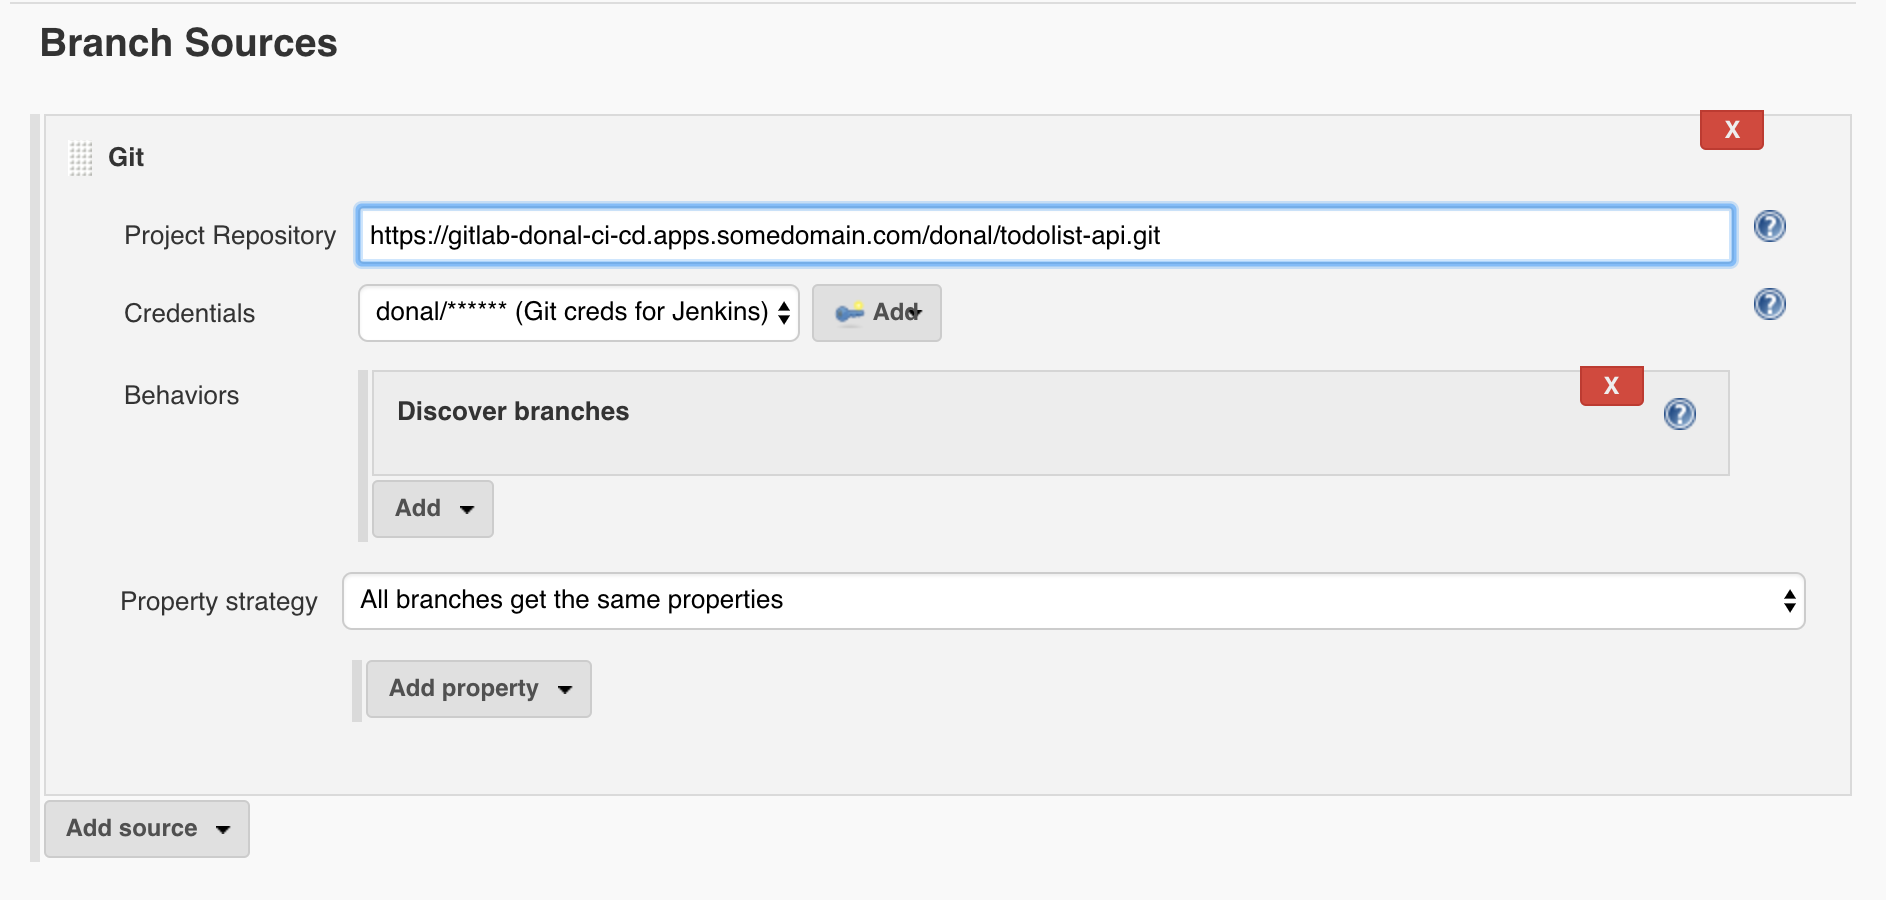
Set the Scan Multibranch Pipeline Triggers to be periodic and the interval to 1 minute. This will poll the GitLab instance for new branches or change sets to build.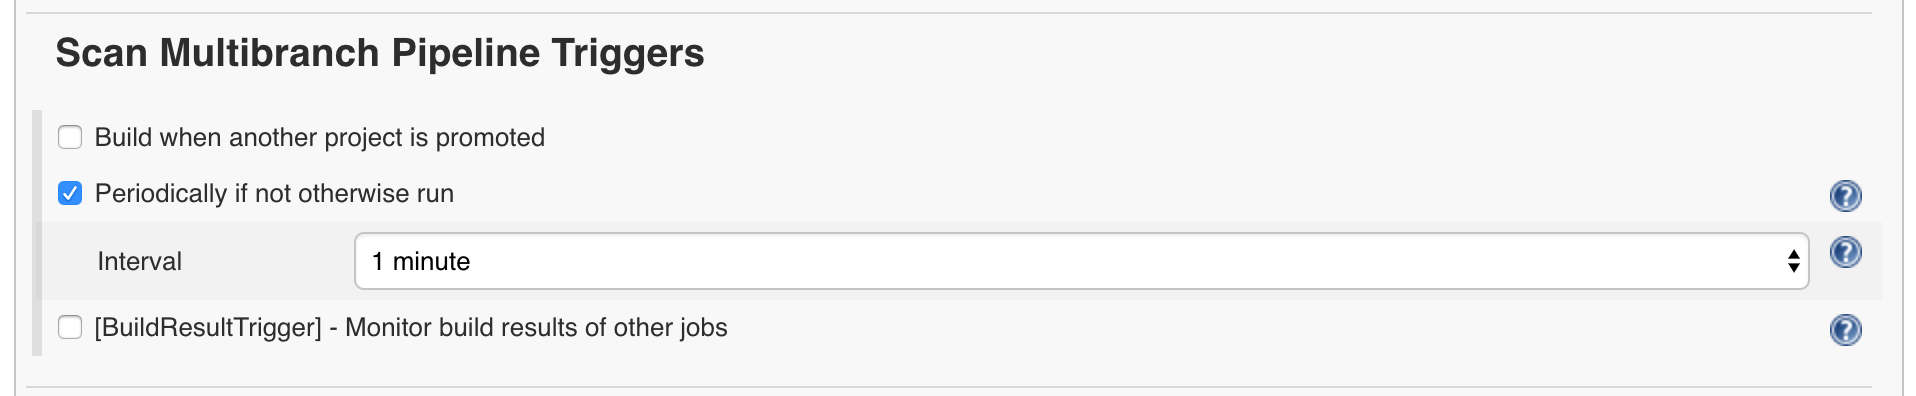
Save the Job configuration to run the intial scan. The log will show scans for master and develop branches, which have no Jenkinsfile so are skipped. The resulting view will show the feature/jenkinsfile job corresponding the only branch that currently has one. The build should run automatically.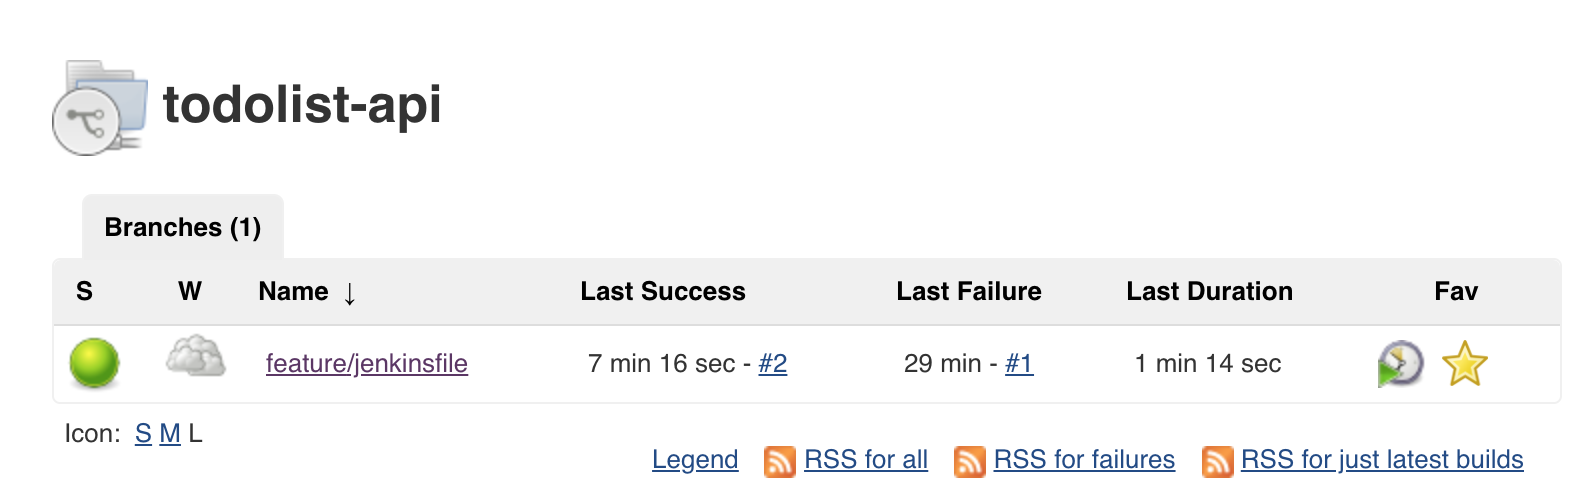
The pipeline file is setup to only run bake & deploy stages when on master or develop branch. This is to provide us with very fast feedback for team members working on feature or bug fix branches. Each time someone commits or creates a new branch a basic build with testing occurs to give very rapid feedback to the team. Let's now update our master and develop branches to include the Jenkinsfile and delete the feature branch.bash git checkout develop bash git merge feature/jenkinsfile # you may get merge conflicts at this point
NOTE: You may see a number of merge conflict warnings at this point. You can safely ignore them and proceed to commit the changes.
git add .
git commit -m "Jenkinsfile updates"
git checkout master
git merge develop
git push -u origin --all
# this is to delete the branch from the remote
git push origin :feature/jenkinsfile
Back on Jenkins we should see our todolist-api pipelines have changed with the develop and master now appearing. The feature/jenkinsfile branch was deleted so this job will go away after some time.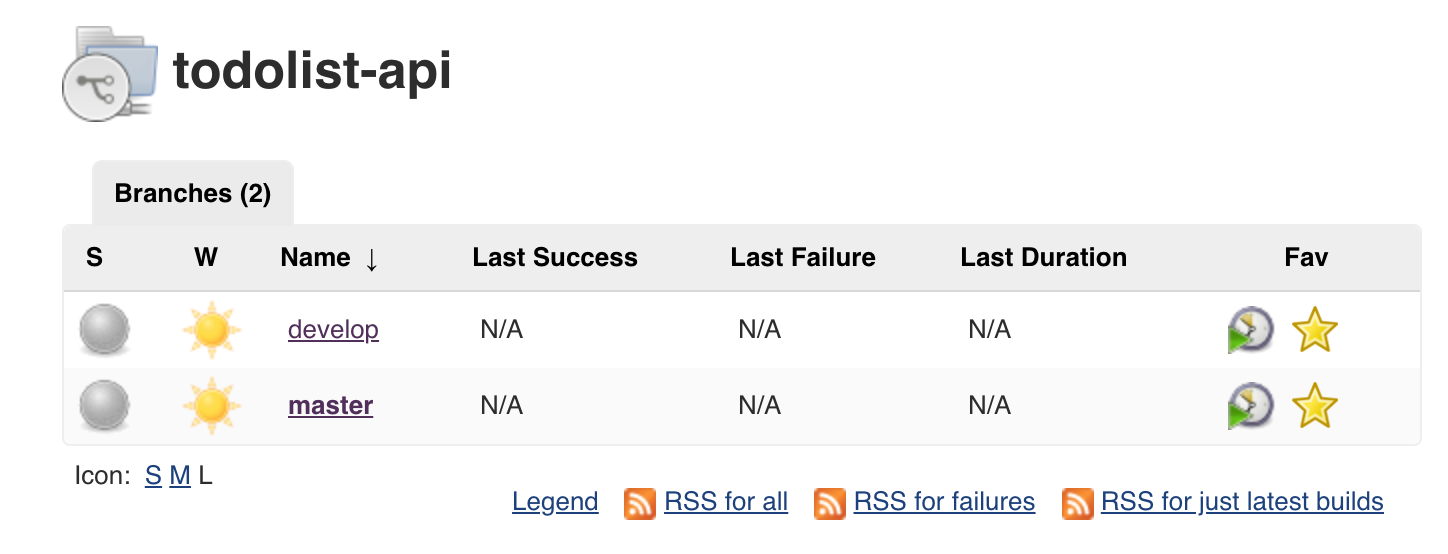
With the builds running for develop and master we can explore the Blue Ocean View for Jenkins. On the Job overview page, hit the Open Blue Ocean button on the side to see what modern Jenkins looks like.
We can move on to the todolist-fe job. The process is the same as before, checkout the feature branchbash cd todolist-fe bash git checkout feature/jenkinsfile
Open up your todolist-fe application in your favourite editor and move to the Jenkinsfile in the root of the project. Update all <YOUR_NAME> and <GIT_USERNAME> as you did before, including in the prepare environment steps. Check the GITLAB_DOMAIN is set too.
Commit your changes to your feature branch as you did previously.bash git add Jenkinsfile bash git commit -m "ADD - namespace and git repo to pipeline" bash git push
This time update your master and develop branches before creating config in Jenkins git checkout develop bash git merge feature/jenkinsfile # you may get merge conflicts at this point bash git add . bash git commit -m "Jenkinsfile updates" bash git checkout master bash git merge develop bash # this is to delete the branch from the remote git push origin :feature/jenkinsfile bash git push -u origin --all
On Jenkins; create a new Multibranch Pipeline job called todolist-fe.
Add the todolist-fe git repository and set the credentials for git accordingly.
Set the trigger to scan every minute as done previously. Save the configuration and we should see the collection of Jobs as shown below.
NOTE: If the
feature/jenkinsfilejob is running, you can stop it to speed up the job execution for themasteranddevelopbranches.
test environment!
This exercise adds a new BuildConfig to our cluster for the todolist-apps to run their pipelines in OpenShift using the OpenShift Jenkins Sync Plugin. We will use the OpenShift Applier to create the content in the cluster
For the rest of the lab, ensure that you are working from the master branchbash cd todolist-fe git checkout master
Open the todolist-fe app in your favourite editor. Move to the .openshift-applier directory. Explore the template/ocp-pipeline. This template creates a BuildConfig for OpenShift with a Jenkinsfile from a given repo. In this case; it will be the Jenkinsfile at the root of our application.
Open the params/ocp-pipeline file and update PIPELINE_SOURCE_REPOSITORY_URL with the git url of your project (Don't forget to add the .git at the end). For example: PIPELINE_SOURCE_REPOSITORY_URL=https://gitlab.<APPS_URL>/<GIT_USERNAME>/todolist-fe.git PIPELINE_SOURCE_REPOSITORY_REF=develop NAME=todolist-fe
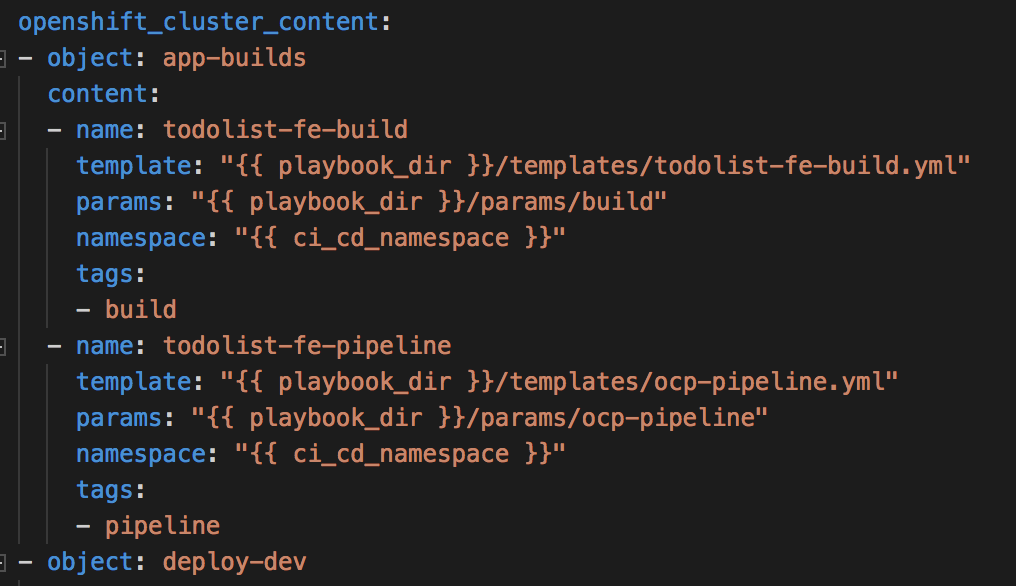
Create a new object in inventory/group_vars/all.yml to drive the ocp-pipeline template with the parameters file you've just created. It can be put under the existing todolist-fe-build object.
```yaml
Log in to OpenShift using the oc client, and use the OpenShift Applier to create the cluster contentbash oc login https://<CLUSTER_URL> bash cd todolist-fe/.openshift-applier bash ansible-playbook apply.yml -i inventory/ \ -e "filter_tags=pipeline"
NOTE: Windows users should run theoccommand and Ansible playbook from inside thedo500-toolboxcontainer.
With these changes in place, commit your changes to GitLabbash git add . bash git commit -m "ADD - ocp pipeline in git repo" bash git push
Login to your OpenShift Cluster and go to the <YOUR_NAME>-ci-cd namespace. On the side menu; hit Builds > Pipeline to see your newly created pipeline running in OCP Land.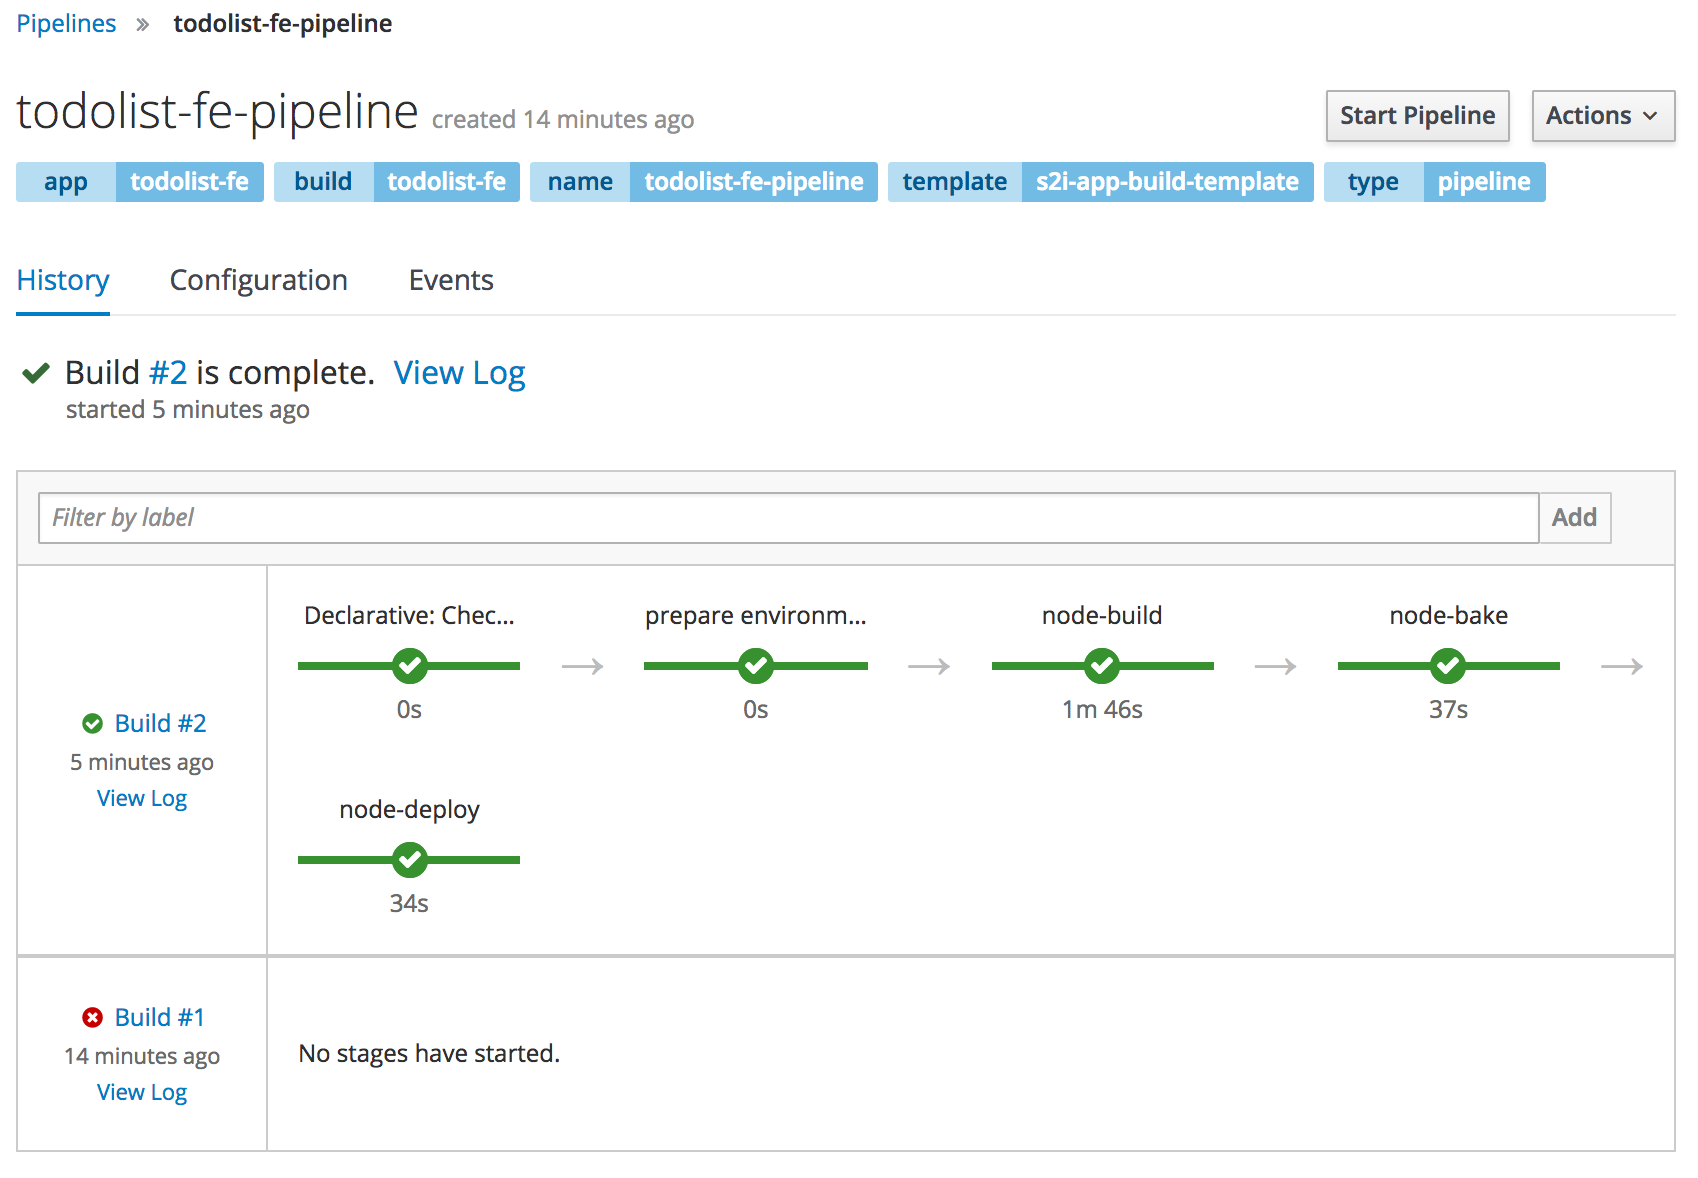
Running the pipeline from here will run it in Jenkins. You can see the job sync between OpenShift and Jenkins if you login to Jenkins. You should see a folder with <YOUR_NAME>-ci-cd and your pipeline jobs inside of it.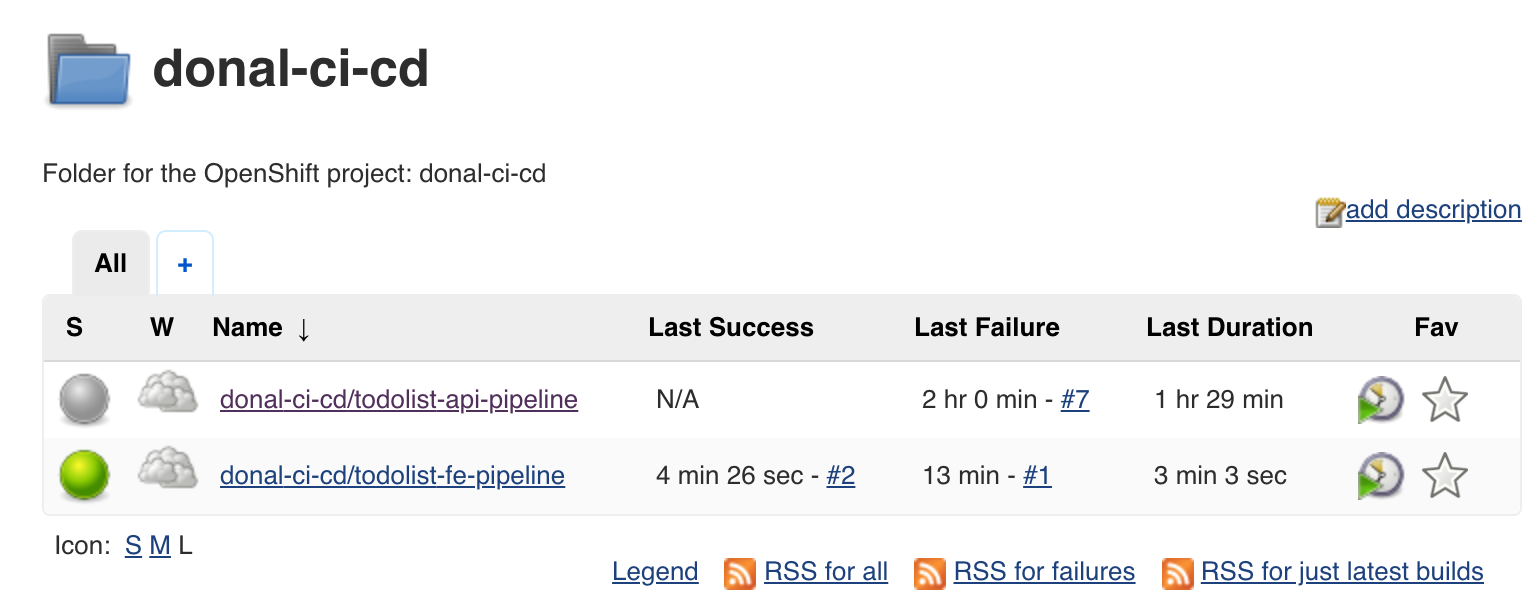
NOTE: If you see failures in the first pipeline run, re-run the pipeline again and it should succeed.
With the configuration in place for the todolist-fe; repeat the process for the todolist-api.bash cd todolist-api/.openshift-applier bash git checkout master
Update the todolist-api/.openshift-applier/inventory/group_vars/all.yml with a new object to drive the params and template
```yaml
Update the todolist-api/.openshift-applier/params/ocp-pipeline PIPELINE_SOURCE_REPOSITORY_URL=https://gitlab.<APPS_URL>/<GIT_USERNAME>/todolist-api.git PIPELINE_SOURCE_REPOSITORY_REF=develop NAME=todolist-api
Use the OpenShift Applier to create the cluster contentbash cd todolist-api/.openshift-applier bash oc login https://<CLUSTER_URL> bash ansible-playbook apply.yml -i inventory/ \ -e "filter_tags=pipeline"
NOTE: Windows users should run the
occommand and Ansible playbook from inside thedo500-toolboxcontainer.
Login to your OpenShift Cluster and go to the <YOUR_NAME>-ci-cd namespace. On the side menu; hit Builds > Pipeline to see your newly created pipeline running in OCP Land.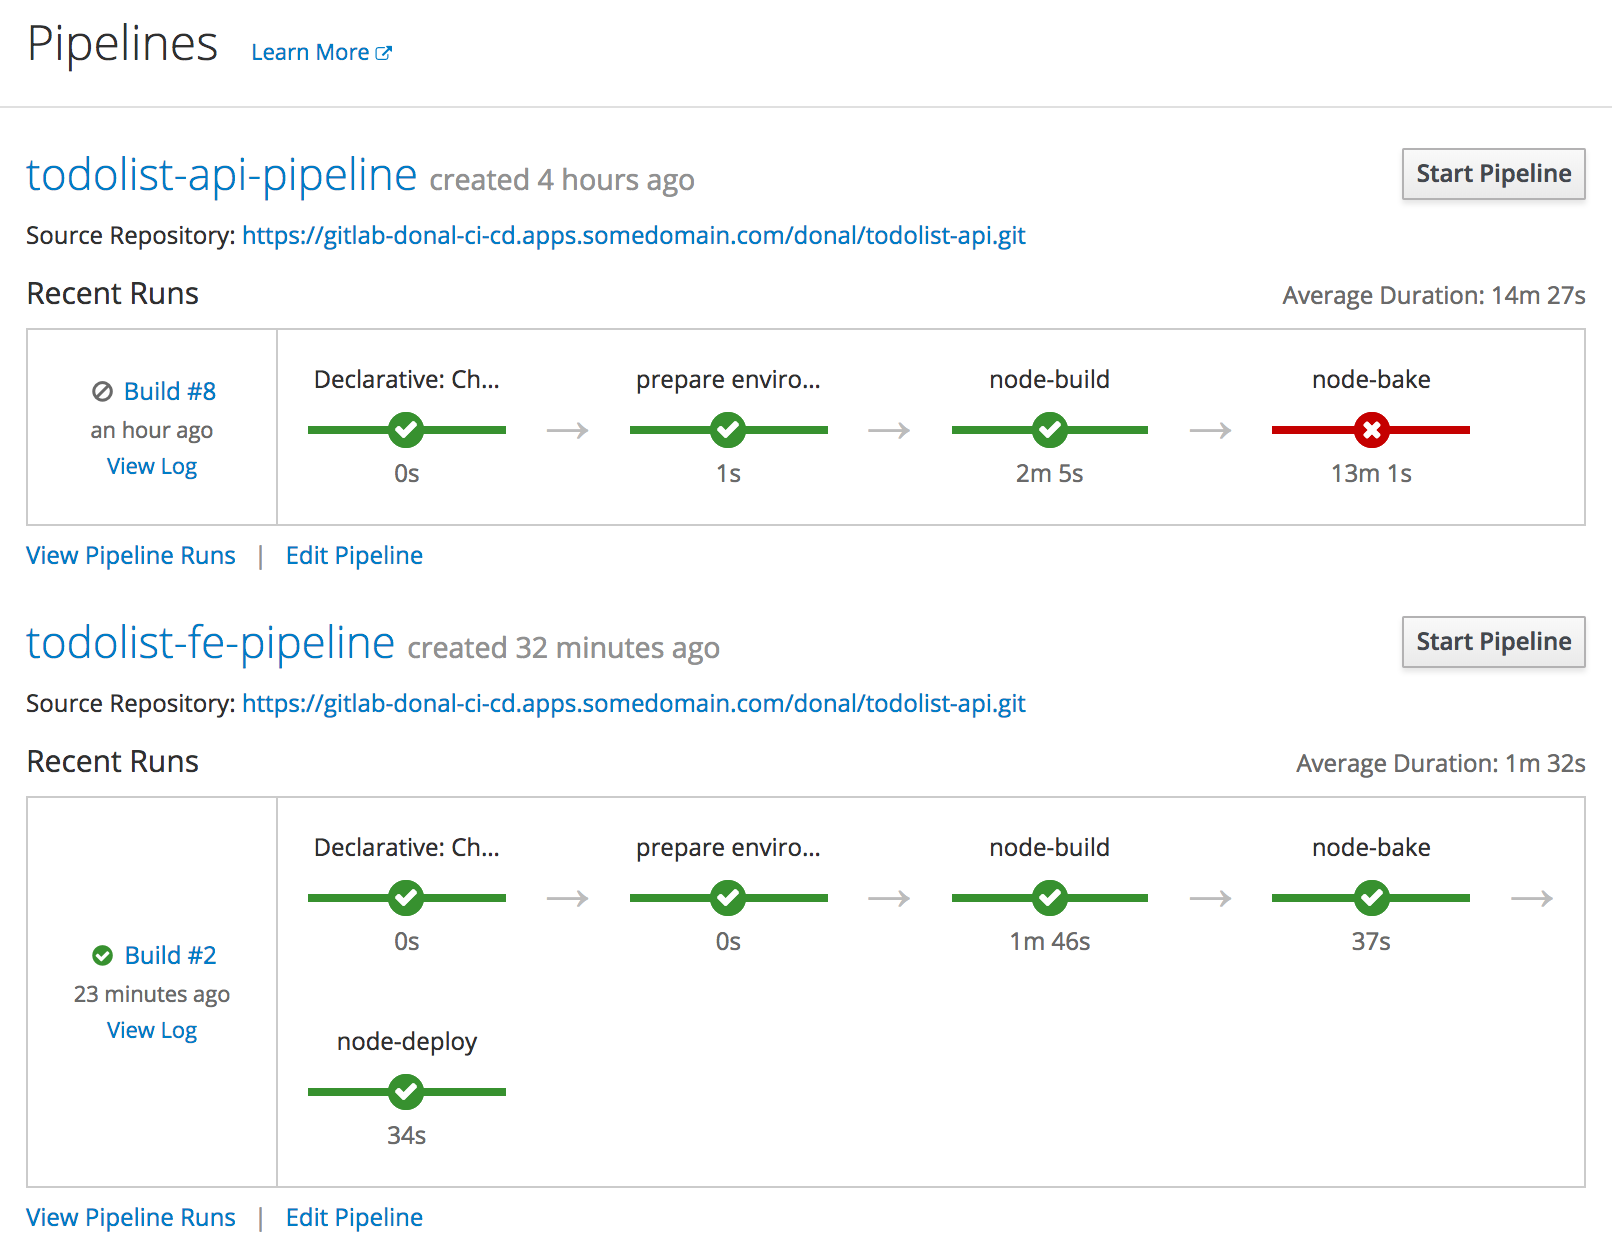
Commit your changes to GitLabbash git add . bash git commit -m "ADD - ocp pipeline in git repo" bash git push
This part of the exercise focuses on updating the
enablement-ci-cdrepo with some new jenkins-slave pods for use in future exercise
Arachni is a feature-full, modular, high-performance Ruby framework aimed towards helping penetration testers and administrators evaluate the security of web applications.
To save time, a slave S2I image for Arachni scanner has already been built for you and pushed to the openshift namespace. Tag and label the image so that it is available for builds in the <YOUR_NAME>-ci-cd namespace.bash oc project <YOUR_NAME>-ci-cd bash oc tag openshift/jenkins-slave-arachni:latest jenkins-slave-arachni:latest bash oc label is jenkins-slave-arachni role=jenkins-slave-arachni
NOTE: Windows users should run theoccommands in thedo500-toolboxcontainer.
Head to on OpenShift and move to your ci-cd project Builds > Images. You should see the jenkins-slave-arachni image.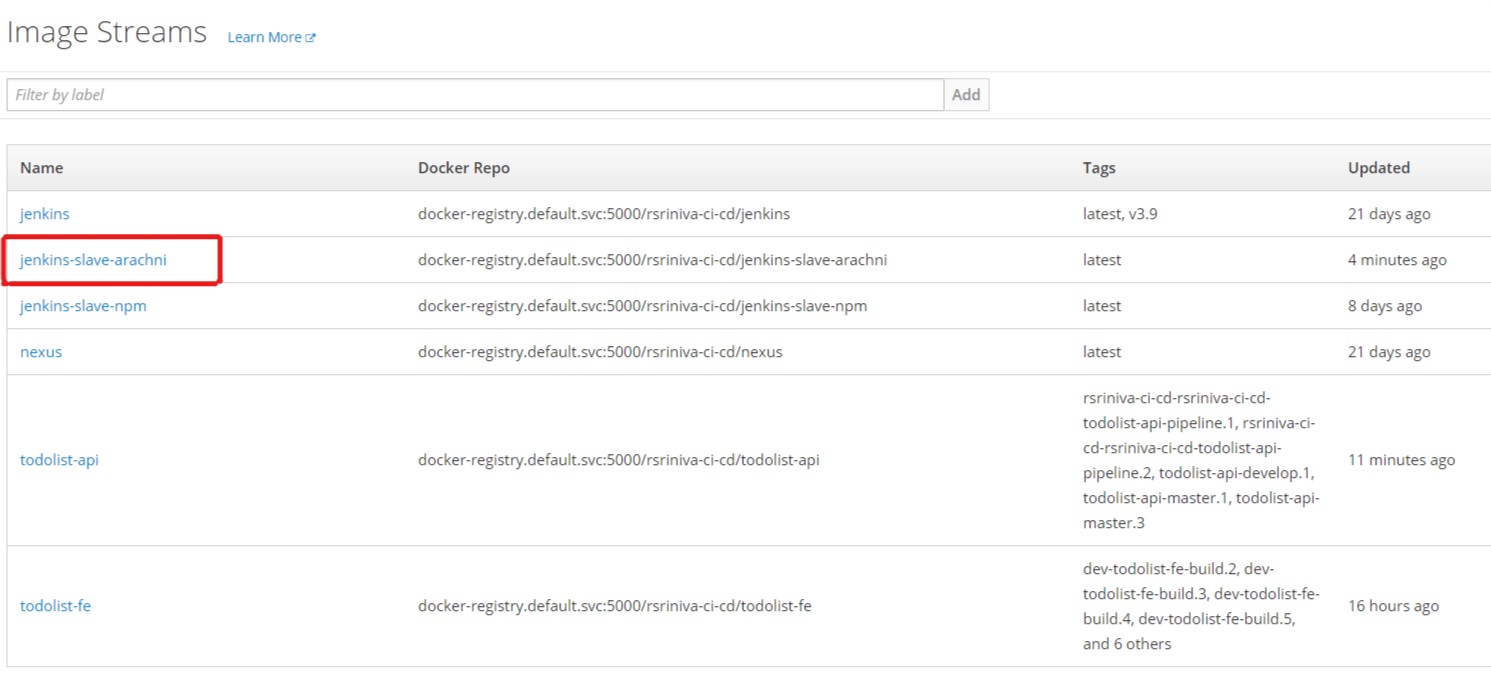
Just like you did with the jenkins-slave-npm, configure the jenkins-slave-arachni pod template to bypass SSL certificate checks in the Jenkins global configuration settings. Log in to Jenkins and navigate to Manage Jenkins > Configure System page.
Locate the Kubernetes Pod Template section by scrolling to the bottom of the page and click on Add Pod Template to add a new pod template for the Arachni scanner slave.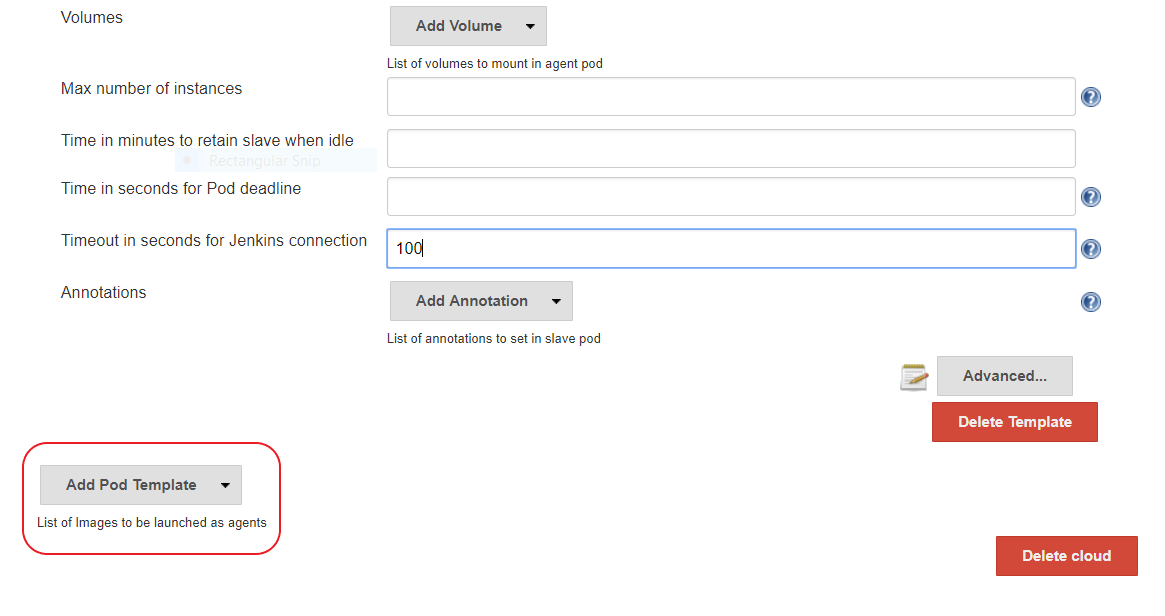
For the new pod template, enter jenkins-slave-arachni in the Name and Labels fields.
In the Containers section for the pod template, add a new container template with the following details:
jnlp in the Name fielddocker-registry.default.svc:5000/<YOUR_NAME>-ci-cd/jenkins-slave-arachni in the Docker image field/tmp in the Working directory field${computer.jnlpmac} ${computer.name} in the Arguments to pass to the command fieldAdd a new environment variable for the container template called GIT_SSL_NO_VERIFY and set its value to true. Your final jenkins-slave-arachni kubernetes pod template should look like the following: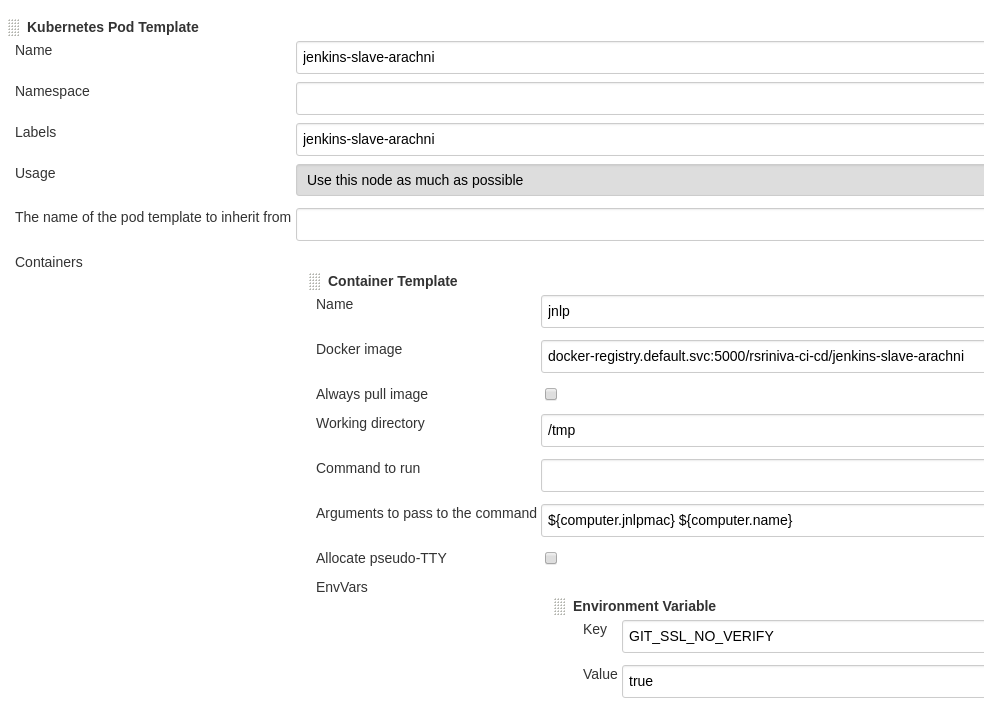
Click Save at the bottom of the page to save your global Jenkins settings.
